[alert-announce]If you have updated your Windows OS to 11 then you might face the headphones not working issue in windows 11 PC. This is because the Operating system is the latest and still under development process. If you also get the error like Windows not detecting my headphones and you are looking for an article that can help you in fixing the issue then your search is ended here. [/alert-announce]
It is a common issue that many users have faced and can be fixed easily and quickly. In this article, we will discuss the best 7 ways through which you will be able to get rid of the error.
Sometimes Windows does not detect my headphones due to physical damage. You might have dropped it or it might get damaged or its wire is broken or any other physical damage can cause the error and can’t be able to connect with your Windows 11.
Let’s discuss in brief the issue due to which Windows is not detecting my headphones occur.
Why is my PC Not Detecting My Headphones
Your PC is not detecting your headphone due to the broken wiring or the headphones might not connect properly. If you are getting headphones not working in Windows 11 error then it can be because of the listed reasons:
- Damaged headphones
- Disconnected or headphones not connected properly
- Got wet due to water or sweat
- Outdated audio drivers
Apart from these, several other reasons cause headphones not working in Windows 11 error. No matter what the reason is we are here with the methods that can surely fix the issue and offers you great sound quality.
How To Fix Headphones not working on Windows 11
Let’s discuss the methods one by one.
Method 1: Update Your Windows OS
If you have outdated Windows OS then probably you will face an error in connecting your headphone to your system. For this, you need to update your Windows OS. Follow the below steps to update your Windows operating system:
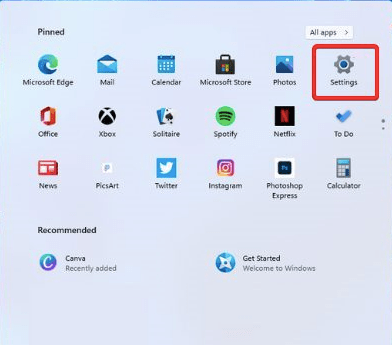
- Click on the start menu and then click on the Settings option.
- When the Windows settings window opens up navigate to the Windows update given on the left screen.
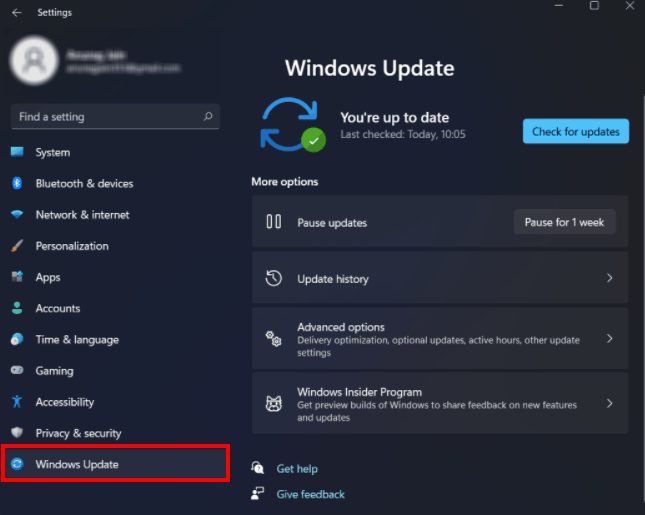
- In the next window, click on check for updates.
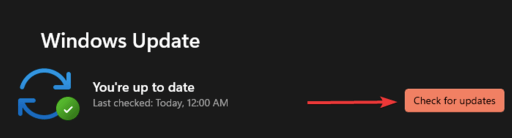
- Windows will take a few seconds to search for the latest updates and if any are available then it will install it on your PC.
- Lastly, restart your system and check if the issue has been fixed or not.
Method 2: By Updating the Outdated Audio Drivers
Audio drivers play an essential role in connecting the headphones. Due to the outdated Audio Drivers, you may face Headphones not working error on Windows 11.
You can either update the audio drivers by visiting its official website or follow the given below steps to update the audio driver:
- Type Device Manager in the search box given at the left corner of the screen.
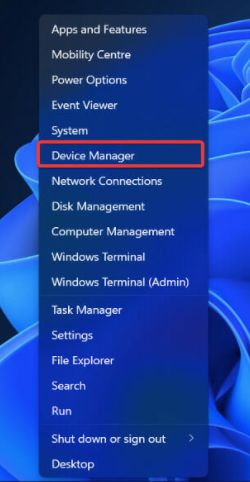
- When the window appears look for the audio, input and output and expand the categories by double-clicking on it.
- All the output and input devices of your system’s list appear, select your headphones.
- Click on update driver after clicking right on your headphones.
- A pop-up window appears, select the first option that is searched automatically for drivers.

- Windows will take a few seconds to search for the latest drivers. And if available it will quickly install on your Windows 11.
The above steps will help you to update your outdated audio drivers. You can also choose the third party tool to install the latest drivers automatically on your PC.
Hope this method works and helps you fix the issue. If not then go for the next method mentioned below.
Method 3: By Restarting your Windows PC
Windows 11 headphones, not working issue can occur due to the temporary bugs. These bugs can be resolved by restarting your PC. So, if the headphones are not working turn off your system and restart it.
Try to use the headphones again and if the error is not fixed then choose the other given methods.
Method 4: Disconnect and Reconnect the Headphones
Sometimes the error lies in the headphones themselves. If you are using wired headphones then it might be because of the damaged headphone. Try to disconnect the wired headphone and reconnect it.
If you are using Bluetooth headphones then follow the given steps to fix Windows 11 headphones not working:
- Open Windows by pressing Win + I keys together on the keyboard.
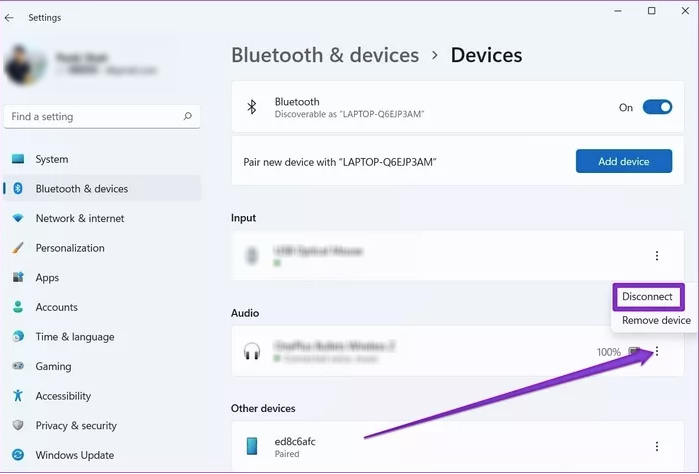
- When the settings page appears, go to the left pane and click on Bluetooth and devices options.
- Now, on the right side, under the audio section look for your device.
- Click on the three dots given ahead of our device name and choose the Remove device option.
- A prompt message will appear for confirmation. Confirm removing the device.
- Next, click on add device.
- A window will appear where you need to select the Bluetooth options.
- Make sure the Bluetooth is turned on and the headphones are in pairing mode.
- It will show your device in the list. Choose your device and pair it with your system.
- When your device is successfully paired with your system a confirmation window will appear stating that your Bluetooth device is connected.
Method 5: Running the Windows Sound Troubleshooter
If the above method didn’t work then try to run the sound troubleshooter to fix the issue. Follow the given below are steps to run the troubleshooter:
- Open settings by pressing Win + I keys together.
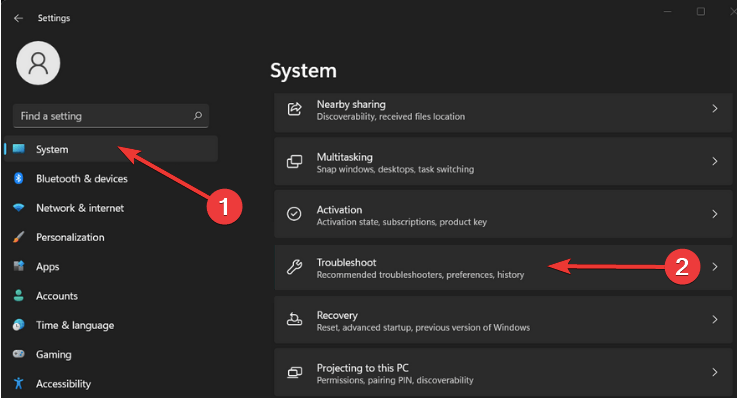
- On the settings, window click on the System option given in the left pane of the window.
- After that in the right window select, the troubleshoot option.
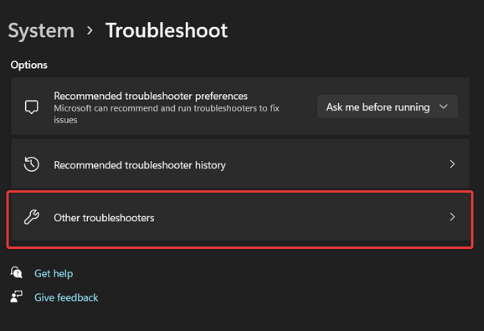
- Next, click on the other troubleshooter option.
- Under the most frequent option, click on the Run option given next to the playing audio.
- Lastly, follow the given on screen instructions to complete the process. Restart your PC and check if the error is still there.
Let’s discuss the next method.
Method 6: Enabling Playback Device
Many times you forgot to enable the playback device and face an error in using headphones. You need to follow the below steps to enable playback device:
- Firstly, go the right corner of the bottom of the screen where you will get a sound icon.
- Right-click on that sound icon and then choose sound settings.
- It will open a window where you need to go to the bottom of the page to find more sound settings.
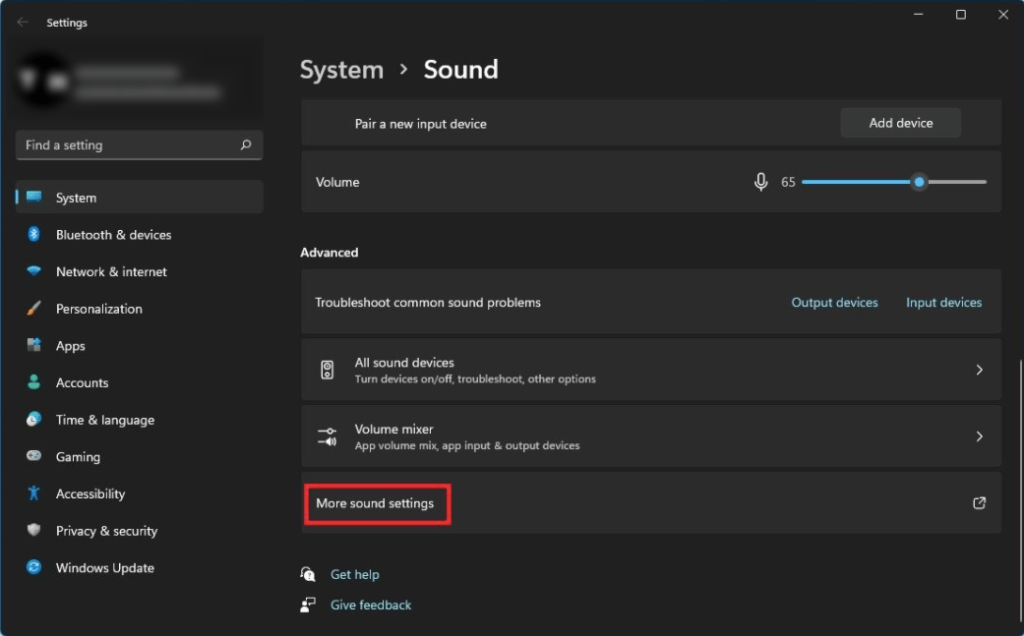
- Once you get the option click on it.
- It will open a new window which is sound window.
- Click on the playback tab and choose your device and right click on it.

- Lastly, click on enable option.
Restart your PC and use the headphone again to check if the error is resolved or not.
Method 7: Disable and Re-enable the device
If nothing works then the last option remains is to disable the device and re-enable it to fix the Windows 11 headphones not working error. Following are the steps you need to follow to execute this method:
- Open Device Manager and click on the audio, inputs and outputs option to expand the categories.
- Choose your headphones and right click on it to click on disable device option.
- A dialogue box will appear, click on yes to confirm.
- After the Device is disabled.
- Go back and again right-click on your device and then click on enable device option.
Conclusion
In the above article, we have listed the top 7 methods to fix headphones not working in Windows 11 issue. Before choosing any of the methods, you should check your headphones wire if it is torn or damaged. Due to the damaged wire, your headphone will not work in any system. You can also check the headphone in another system to check if there is an issue with the hardware of your system.
If the issue occurs due to these reasons then you need to purchase a new headphone and for the second reason use the headphone on another Windows 11 PC. I hope the article would be useful for you and help in fixing the error.
FAQs
Why won’t my headphones work on Windows 11?
If your headphones not working on your PC then it might be because of physical damage. Apart from physical damage, there are several reasons behind not working headphones. Like outdated audio drivers, outdated windows OS, loose wiring, headphones not connected properly, etc. You can fix the issue by using any of the methods given in the article.
How do I enable headphones on Windows 11?
You can enable headphones on Windows 11 by following the steps given below:
- Go to the right corner of the bottom of the screen and right-click on the sound icon.
- Now, in the pop-up options, click on the sound settings.
- When the windows appear, scroll down the page and click on the more sound settings option.
- After this, the sound window will open up.
- Click on the playback tab and right-click on your device.
- From the options click on the disable option to enable your headphones.
Why is my laptop not detecting headphones?
Your laptop may not detect headphones due to several reasons:
- Not connected properly
- Disabled headphones
- Outdated audio/ sound drivers
If you are using Bluetooth headphones and your laptop is not detecting it then the error is in your Bluetooth Drivers.