Do you suddenly notice your PC slowing down? If your computer displays a lag in performance all of a sudden, then you must investigate further to see what is causing this abnormal behaviour. One easy way to look into the system’s processes and activities is to open the Task Manager of your Windows PC. The Task Manager displays what background and active processes are running on Windows at any given point in time.
If you see a background process called PC Doctor Module running in your system that is hogging all the system resources, then it becomes pretty evident that it is the very reason for encountering a sluggish performance of Windows.
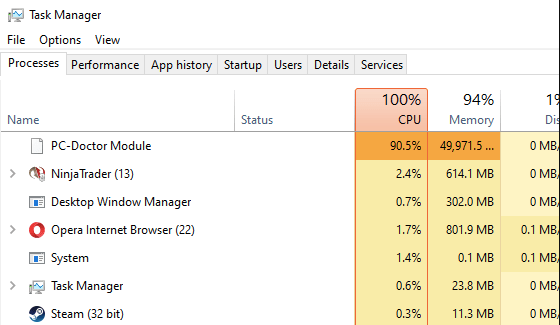
If you are wondering what is PC Doctor Module high CPU usage error is, why is it happening, and how to fix it, then here is a blog for you that brings forth all these answers.
Is PC Doctor a virus?
If you see that PCDM is completely hogging the system resources and worry if it is a virus, then here’s how you can confirm your doubt:
- Launch Task Manager and right-click on the PCDM process to choose the ‘Go to details’ option.
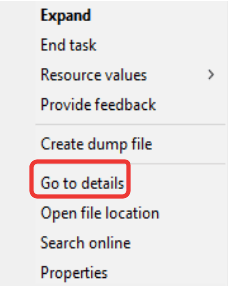
- This will take you to the executable file name of the app.
- Next, right-click on it to select the ‘Open file location’ option from the context menu.
- If you are redirected to the below location then the PCDM process and file is genuine. If not, then it could be a virus that needs removal.
C:\Program Files\Dell\SupportAssistAgent\PCDr\SupportAssist\6.0.7193.611\pcdrmemory2.p5x" run -e -lang en -cust dell -var dsc -bd "C:\ProgramData\PCDr\7193" -engineClientPid.
How To Fix PC Doctor Module high CPU Usage
Now, that you have become familiarized with PCDM error and what causes it, here are its recommended fixes.
1. Disable Automatic Scans of Dell SupportAssist
The following steps will guide you to fix the error with a few tweaks to the optimization settings of SupportAssist.
- Open the SupportAssist app from Windows Start Menu.

- From the History tab, click on the recently completed scheduled scans.
- Look at the top right corner of the SupportAssist window, click on the gear icon.
- Now, uncheck the ‘Turn on automatic system scans and optimizations at’ option to disable automatic scans.

- Alternatively, you could also alter the scan schedules.
2. Troubleshoot with Windows Services
Here is an alternative method to fix the PCDM error on Dell computers:
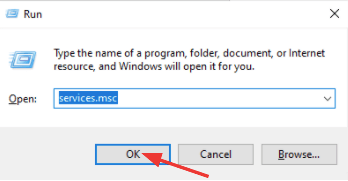
- Hit Windows + R keys on your keyboard to open the Run Dialogue Box.
- Now write services.msc and press OK to open the Windows services box.
- Scroll down through the list of services actively running on your PC to locate Dell SupportAssist.
- Double click on SupportAssist to open the Properties windows.
- Set the ‘Startup Type’ to ‘Automatic (Delayed Start)’ as the default option. Doing this will turn off the scheduled hardware scans.

- Ultimately, click Apply & then OK to save all the changes.
3. Uninstall Dell SupportAssist
If the above fix did not work for you to get rid of the PC Doctor Module high CPU usage error, then you can try the next recommended solution which is to uninstall the Dell SupportAssist.
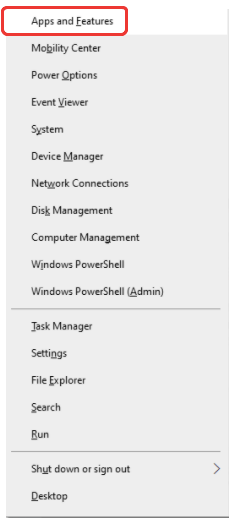
- Open the Windows menu by hitting Windows + X keys together.
- Now select the Apps & Features option and look for Dell SupportAssist there in the Apps & Features Settings list.
- Finally, click on it and then, press the Uninstall button.
4. Use a PC Optimizer tool
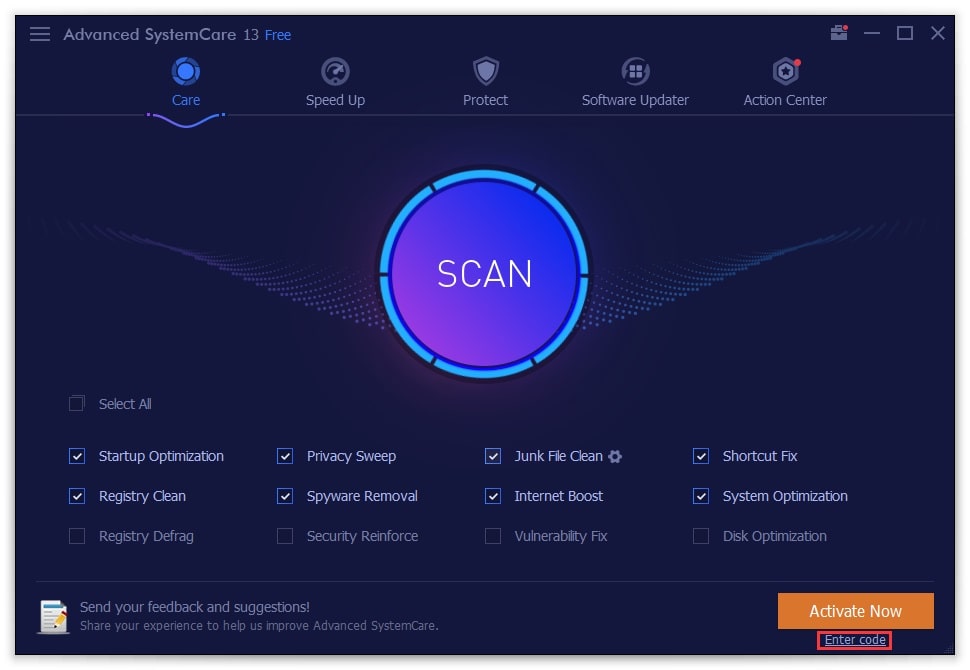
If nothing else seems to work, then you can use a PC optimizer tool like IObit Advanced SystemCare. This tool comes with a one-click scanning button and has an amazing interface. It is enabled with real-time PC optimization, internet speed-boosting ability, privacy protection, and deep registry cleaning.
All you can do is download the tool and install it on your Dell PC. Further, you can launch the tool and click the scan button to initiate optimization of the PC. Ultimately, you can reboot your PC to make the changes effective.
What is PC Doctor Communications Manager
Dell SupportAssist is a tool specifically found only in Dell computers that optimizes the PC performance by recommending useful software and detecting and suggesting device driver updates.
PCDM is one part of the Dell SupportAssist. It is designed to run in the background to identify PC performance problems and find its solutions by forwarding the errors to the Dell Tech Support team. Thus, it is an automatic way of finding whether your Dell computer is performing well and whether it needs any resolutions.
Dell SupportAssist is also capable of running hardware scans to analyze and reveal issues with Hard Disk Drive, USB components, Memory, Network Card, PCI Bridge, DVD-RW Drive, HUB, Mouse, etc. Furthermore, it can also perform SMART Short Self-Test, Targeted Read Test, Linear Read Test, CPU Stress Test, etc.
Due to multiple tasks that Dell SupportAssist performs; it often consumes much of system resources.
Conclusion On PC Doctor Module high CPU usage
So, with this, we conclude this article. We hope that that the above-recommended solutions can help you get rid of the PC Doctor Module high CPU usage error quickly and effortlessly.
Frequently Asked Questions
Can I remove PC Doctor Module?
Yes, in Windows 10 you can remove the PC Doctor toolbox by going to the Windows Settings App and uninstalling the toolbox.
Is it OK to uninstall Dell SupportAssist?
If you want to get rid of the PCD error, then uninstalling the Dell SupportAssist is one of the most effective solutions.
Is PC Doctor a Dell product?
Yes, PC Doctor is an important part of Dell SupportAssist. It appears in Dell laptops and has the function of recommending essential software and driver updates. It can also detect problems and share with the Dell support team, besides helping troubleshoot the problems.
How do I get rid of PCDR?
The most recommended solution to get rid of PCDM is by uninstalling Dell SupportAssist. You can find the steps for the same in the article above.
What is PC doctor dell supportassist api ?
PC-Doctor Module is an important part of Dell SupportAssist.
Also Read


