In general, junk files may seem to be of no problem, but in reality, they consume a lot of your system resources and also cause your PC to slow down. There are different types of junk files that contribute to digital debris that gets piled up on your hard drive over time. This includes, app leftovers, temporary Internet files, thumbnails, caches, cookies, system error logs, recycle bin files and more.
We recommend you to develop the habit of cleaning your PC and get rid of junk files on your computer every now and then. Fortunately, Windows 11 users come with in-built utilities to free unnecessary occupied storage space easily.
5 Ways To Clean Up Junk Files On Windows 11 PC (2022)
To delete unnecessary files on Windows 11 PC, here’s what you can do:
METHOD 1 = Use Cleanup Recommendations To Find Junk Files On Windows
Windows 11 comes with a built-in feature – Cleanup Recommendations that suggest ways to free up disk space by removing large files, temporary files, residues created by unused apps etc.
Step 1: Launch Settings on your PC and navigate to the Storage module.
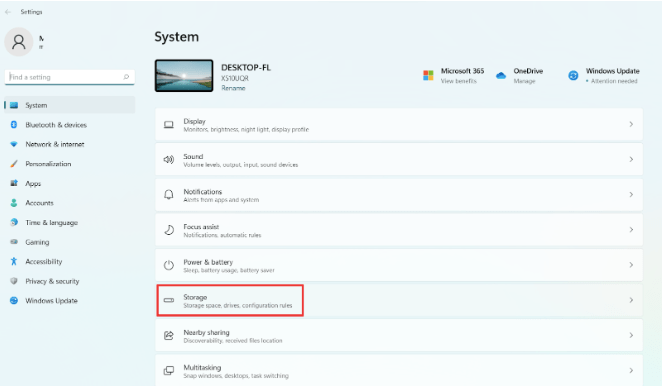
Step 2: In the Storage window, move your cursor towards the Cleanup recommendations, under the Storage management header.

Step 3: As soon as you click on the same, it will scan and list all the temp files, large files, unused files that you can clean to free up space.
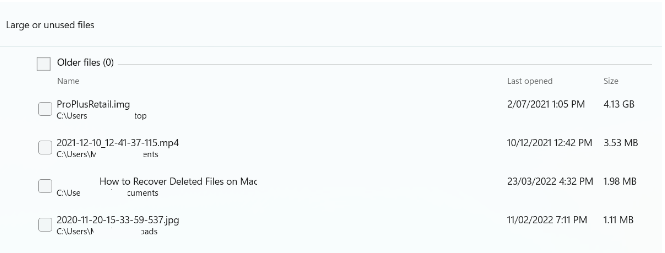
Simply select the files you wish to get rid of and hit the “Clean up” button from the bottom of the window. Besides this, you can also clear files synced to the cloud and unused apps on your computer.
METHOD 2 = Empty Recycle Bin
This is certainly one of the easiest yet fastest ways to remove junk files from a computer. By emptying the Recycle Bin, you will permanently delete all the unwanted files stored in the Trash folder.
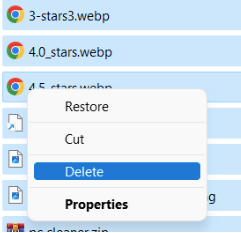
To do so, simply open the Recycle Bin > select all the files > right-click and choose the option Delete from the context menu that appears on your screen.
METHOD 3 = Free Up Hard Drive Space With Storage Sense
Windows 11 features a Storage Sense functionality that provides a set of tools to delete unnecessary files on Windows like temporary files from programs, old installation files and more.
Step 1: Launch Settings on your desktop/laptop.
Step 2: Head towards the System and click on the Storage module from the right-side panel.
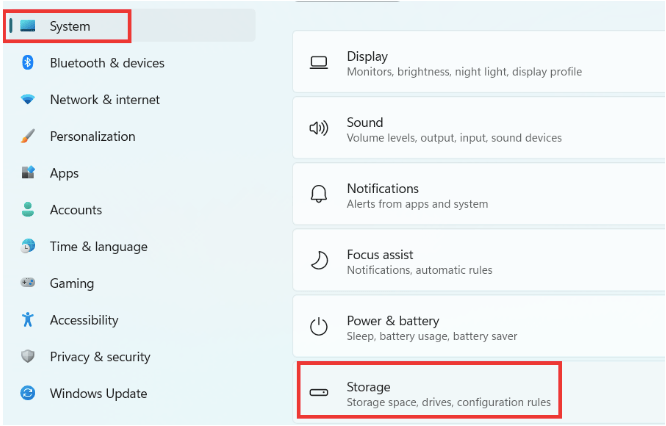
Step 3: On the next page, you will see the Storage management section. Here, you need to toggle on the Storage Sense option.
As soon as you enable the option, it will automatically detect and delete files based on your configuration.

Step 4: After toggling on the switch next to Storage Sense, simply double-click on it & now below the Cleanup of temporary files, simply check the box next to Keep Windows running smoothly by automatically cleaning up temporary system and app files.
You can have a look at the attached image below to get an idea!

Step 5: Do not forget to toggle on the switch next to Automatic User content cleanup as well.
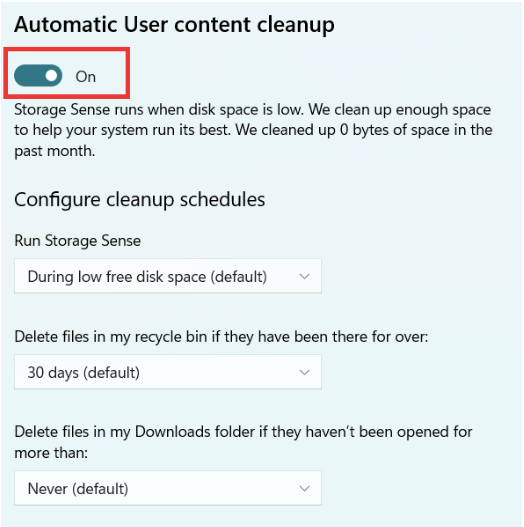
With Storage Sense, you can also configure the cleanup schedules by setting it to run on every day, every week or every month. You can even choose the cleanup option during low free disk space.
METHOD 4 = Use Windows Disk Cleanup Tool
The Disk Cleanup tool comes equipped with almost all popular Windows versions. It’s a dedicated module, designed for cleaning junk files, temporary data, Internet files, setup log files and other residues.
All these files consume a major part of your storage over time. So, use the in-built functionality to get rid of junk files on your computer as soon as possible.
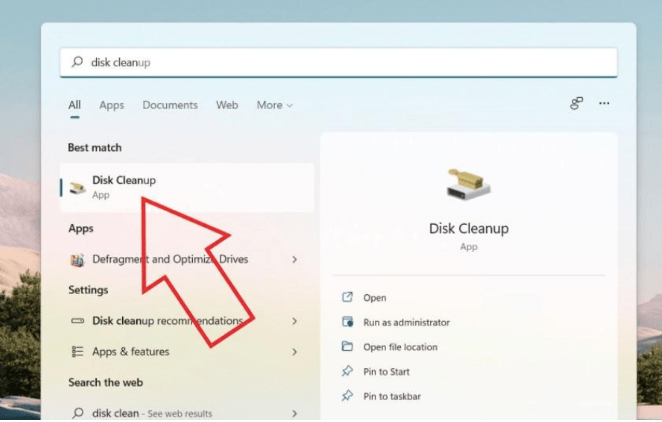
Step 1: Hit the Start menu on your Windows PC and look for Disk Cleanup. As soon as the results appear, choose the most relevant option.
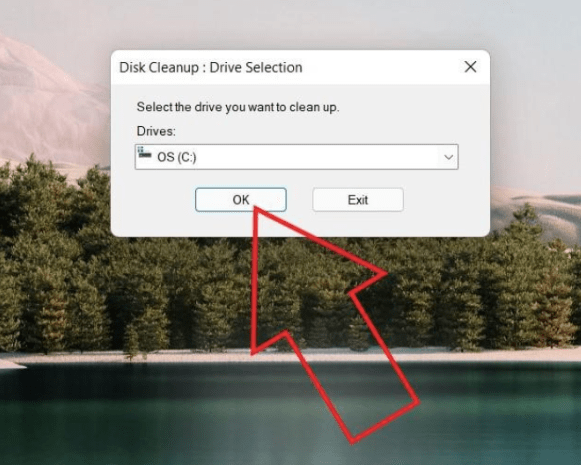
Step 2: Now, select the drive you wish to clean using the drop-down menu that appears on your screen. Once selected, hit the OK button.
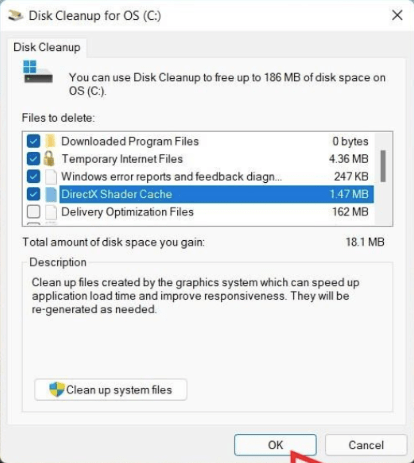
Step 3: Now, you will be shown the list of files that can be cleaned from your PC, so that you can free up unnecessary occupied storage space. Choose the files you wish to delete and hit the OK button!
Step 4: At this step, hit the Delete Files button to complete the process!
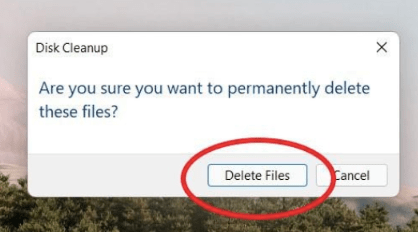
Isn’t this an effortless way to find junk files on Windows? Let’s take a look at another method to clean up junk on Windows 11/10 PC.
METHOD 5 = Run A Powerful Junk File Cleaner
All the above-mentioned methods work great to remove junk files from computers in 2022. But there are some amazing third-party PC cleaning utilities as well that work brilliantly to wipe not only junk data but other irrelevant and space eating files as well. This includes duplicate files, old/irrelevant/unused applications etc.
Not only this, a PC cleaner software also helps in resolving common PC issues that arise due to invalid registry entries and improve overall PC speed by performing disk defragmentation, updating drivers and so on.
The market has a variety of options when it comes to choosing a trustworthy utility to clean junk files and other useless, space hogging files. To name a few, we suggest using CCleaner, Iolo System Mechanic, iObit Advanced SystemCare, Restoro etc.
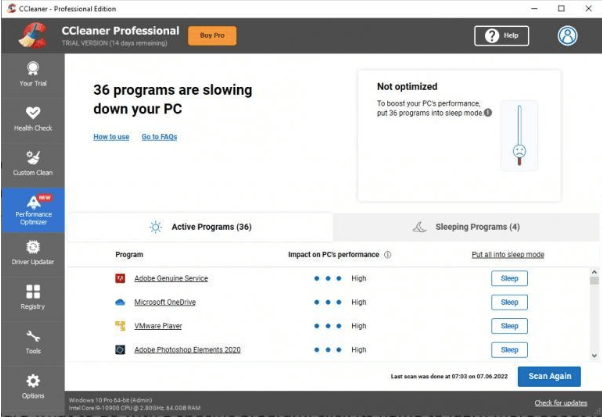
We’ve been using CCleaner for quite a long time now and it has shown impeccable results when it comes to deeply cleaning your computer and boosting system performance. It also offers a dedicated Performance Optimizer module to instantly speed up the device.
These were some of our most favorite ways to clean junk files in Windows. If you use any other methods to easily clean up junk and other redundant data, feel free to mention them in the comments section below!
People Also Ask:
How do I clear all my junk files?
Using a powerful computer cleanup software, you can easily clear all types of junk files in one go.
Is it OK to delete temp files in Windows 11?
Yes! If you are running low on storage space, clearing temp files is certainly a good way to recover additional disk space easily and securely.
How do I optimize Windows 11 for best performance?
There are numerous ways to optimize Windows 11 performance. Some of the most effective solutions are listed below:
- Clean up junk files.
- Close unused tabs.
- Delete your Internet browsing history, cookies, caches etc.
- Manage startup items.
- Remove Dashboard widgets of gadgets.
- Update your device drivers.
- Update outdated software.
Where is the Temp folder in Windows 11?
To locate the Temp folder on your Window 11 PC, all you have to do is:
- Launch the Run window. Just press the shortcut keys – Windows logo + R.
- Type %temp% and hit the Enter button.
- This will open the Temp Folder automatically on your desktop.
Also Read

