We frequently connect removable disk drives to our Windows computers for various reasons. These include pen drives, external hard drives, and SD cards. These portable removable drives are often helpful for storing and transferring data quickly from one system to another.
But sometimes, when we are connecting a new removable drive, a notification such as “external hard drive not showing up” might show up on your computer screen. Other variation messages of this error that we might come across frequently include “Hard disk not detected,” “USB device not recognized,” etc.
There may be innumerable causes of this error. These include partition problems on the external drive, device driver issues, inactive USB ports, erroneous file systems, or even damaged external drives. So, let’s find out from this blog what are the best ways by which you can fix these issues.
How To Fix External hard drive not showing up error in Windows 10
If your external drive is not connecting appropriately to your Windows PC, then any of the below-mentioned measures to get rid of the problem.
1. Enable & format drive in Disk Management
If the drive appears to be powered on and yet you encounter the issue, then follow the below steps to enable and format the external drive in the Disk Management.
- Go to the Start menu and search for “Disk Management.”
- Click on the Create and Format Hard Disk Partitions option to open it.
- Now scroll down on the list to check if the removable drive is appearing.
- If it does, then ensure that it is appearing online.
- If it is appearing offline, then right-click and go to the Online option.
- If the disk is not formatted, then right-click and choose the option of Format.
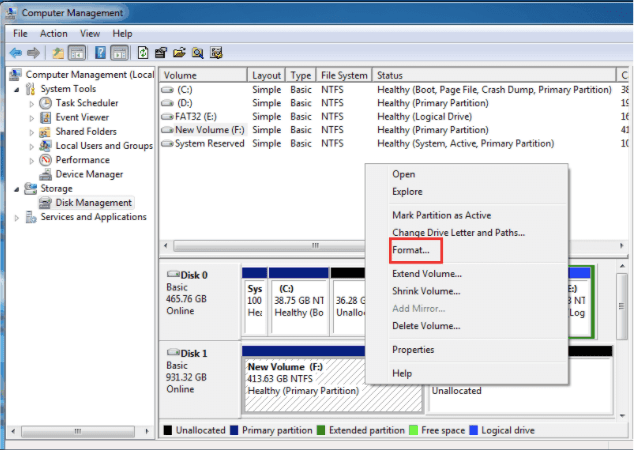
- Formatting will erase all data.
- You can choose to rename your drive and you will also have to choose a file system.
- Finally, click “OK.”
2. Clean the drive
Sometimes the external drive might appear in the Disk Management but even after formatting, it may not work and continue throwing the “external hard drive not showing up in Windows 10” error. In this scenario, you can resolve the issue with the “clean” command as enumerated in the below steps:
- Press the Windows+R keys to open the Run dialogue box.
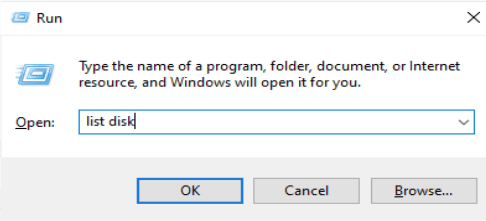
- Write “list disk” in the box and hit the Enter key to open the Disk Management console.
- Now see if the concerned disk is appearing in the list.
- Type “select (name of the disk)” and tap Enter to clean it.
- Then, type “clean” and hit the Enter key.
- This will clean the disk entirely.
3. Switch to another port or PC
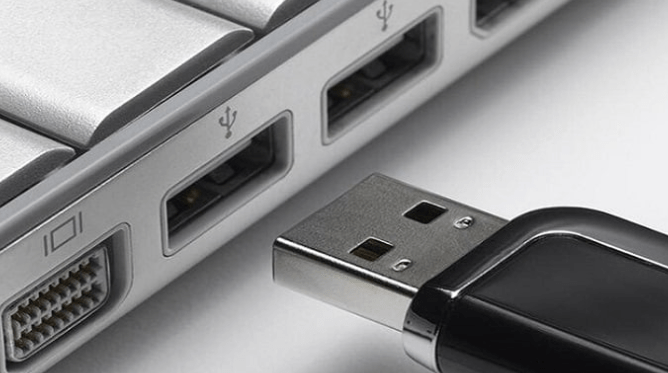
If the external drive is still not working, then you can try unplugging it and connecting it to a new USB port or system to check whether it is responding properly there. You can also verify if the drive is responding in a machine with a separate operating system.
4. Update USB driver from Device Manager
If the USB driver is not outdated or corrupted, then updating it would resolve the issue.
- Type Device Manager in the Windows search box and click it open.

- Scroll down and click expand the USB (Universal Serial Bus) controllers.
- Right-click on the USB driver and click Update Driver Software.
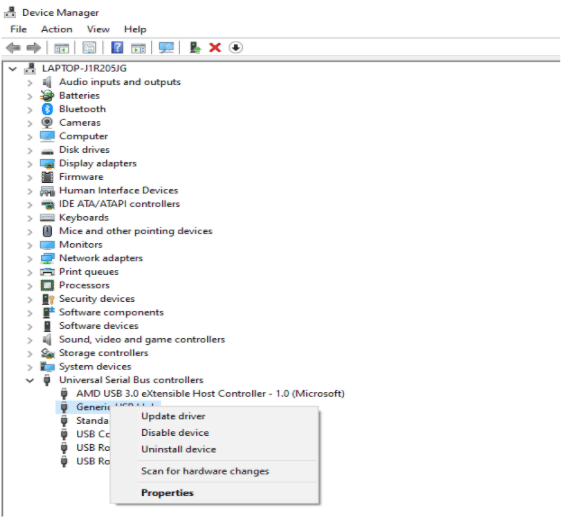
- Follow the on-screen prompts and wait for the completion of the process.
5. Fix USB Root Hub
If you are using a USB hub and your external drive seems to be operating fine, then you fix the USB root hub with the help of the following steps:
- Open the Run command by typing “diskpart” in the Windows Start menu search box.
- Type “devmgmt.msc” and press the “OK” button.
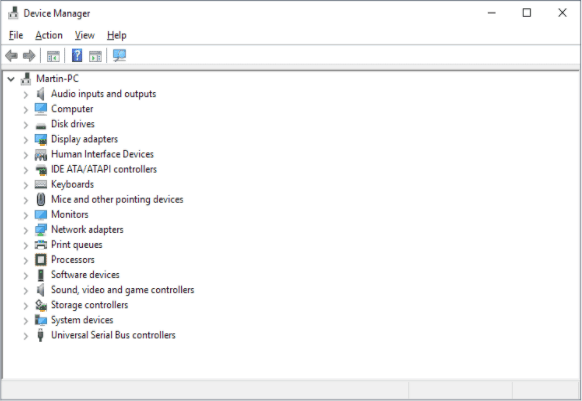
- In the Device Manager window, click on the Universal Serial Bus controllers to expand it.
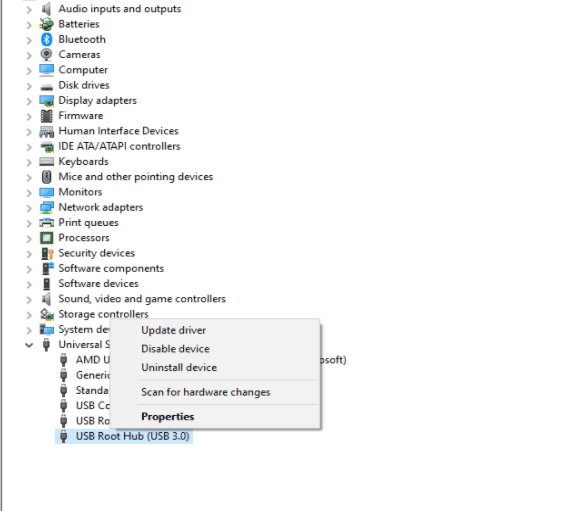
- Now click right on the USB Root Hub and open the Properties window.
- Choose Power Management and untick the box with the option “Allow the computer to turn off this device to save the power.”
- Click “OK” and save changes.
6. Change the drive letters
Renaming the drive can be done from Disk Management as per the below steps:
- Type Disk Management in the Start menu search box and click open to Create and Format Hard Disk Partitions.
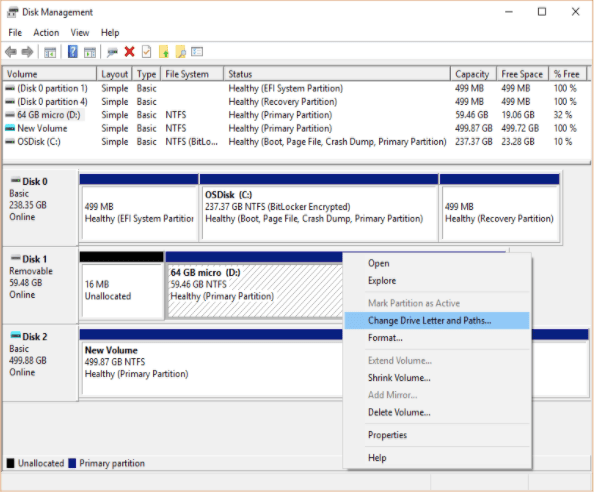
- Right Click on the concerned drive and choose the option of Change Drive Letter and Paths from the drop-down menu.
- Click on the Add button and then rename the drive by choosing the letters from the drop-down list.
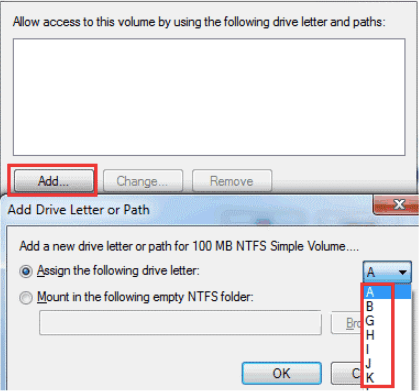
- Ultimately, click “OK.”
Conclusion
So, folks, this is how you can troubleshoot the “external hard drive not showing up” error on your Windows 10 PC. The aforementioned methods are all easy to try and can be executed by oneself. Do let us know in the comments if you have further queries or doubts regarding the execution of the methods.
FAQs
Why is my external hard drive not showing up?
If you come across this error, then it might be due to multiple reasons such as faulty device drives, damaged removable drives, issues with the port, and so on and forth.
What do I do if my hard drive is not detected?
If the hard drive is not detected on your PC, then you can try the troubleshooting methods provided in the article above to fix the problem.
How do I fix my WD external hard drive not showing up on my computer?
You have to reboot your PC in Safe Mode and then check if the WD external hard disk is being detected or not.
How do I fix an external hard drive being detected but not accessible?
When you come across this issue, then it is due to a problem with the USB port. In such a scenario you may switch the hard drive to a new port to the device to make it function.
Also Read


