[alert-announce]Are you looking for ways to disable telemetry in windows 11 or 10 than you are on right blog. When you upgrade your computer, the Telemetry and Data Collection feature comes enabled by default. The feature automatically gathers, consolidates and sends all the information related to user activity to Microsoft.[/alert-announce]
What is Telemetry
In simple terms, Telemetry is a crucial technical data that stores information about the device, how the OS performs in background, which applications do you use, reliability information of the device drivers and monitor your activities comprehensively.
To be honest, the sole aim of sending this data to Microsoft is quite genuine, as the tech giant reviews this data carefully and works dedicatedly to improve your user experience and keep Windows secured.
But there are a lot of people who are highly concerned when it comes to their privacy and security. And, observing that even Microsoft peeks at your data and collects information through its telemetry system, taking a strict action to limit this feature is certainly important.
What if the company shares the aggregated anonymous telemetry data with third parties for certain purposes? Whatever be the reason, you should definitely be extra cautious when it comes to your privacy. Fortunately, there are tons of methods that allow users to disable Telemetry on Windows 11/10 PC. In this post, we’ll take a look at numerous workarounds that support turning off Telemetry and Diagnostic Data Collection.
So, without wasting much time, let’s get started with the effective workarounds!
How Do I Disable Telemetry On Windows 11/10 PC or Laptop
If you do not wish to provide any information to Microsoft, here’s what you need to do to deactivate the Telemetry and data collection process.
METHOD 1 = Use The Registry Editor To Turn Off Telemetry
Take help of Windows Registry to effortlessly disable the Telemetry feature on Windows 10/11 PC. But make sure you backup your registry before making any alterations. Follow the steps provided below to get started:
STEP 1 – Launch Windows Registry Editor by pressing the shortcut keys – WIN + R and type regedit and hit the Enter button.
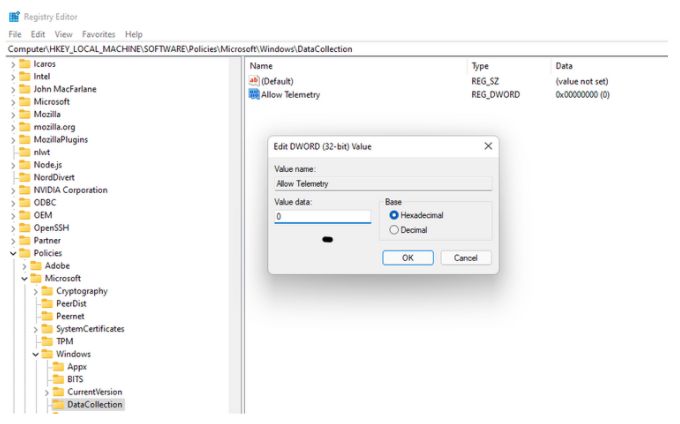
STEP 2 – Follow the path: HKEY_LOCAL_MACHINE\SOFTWARE\Policies\Microsoft\Windows\DataCollection and right-click on the empty space on the right panel and select New > DWORD (32-bit) Value.
STEP 3 – Make sure you name the value Allow Telemetry and double-click on the new value and add the Value data as 0. Click on the OK button!
Close the Registry Editor and restart your computer.
METHOD 2 = Consider Setting The Diagnostic & Usage Data Limit
Well, using this workaround, you can easily limit the amount of user data that gets collected by the Telemetry feature. In such a scenario, you don’t specifically need to disable the Telemetry functionality. Just follow the instructions below to set the diagnostic and usage data to Basic.
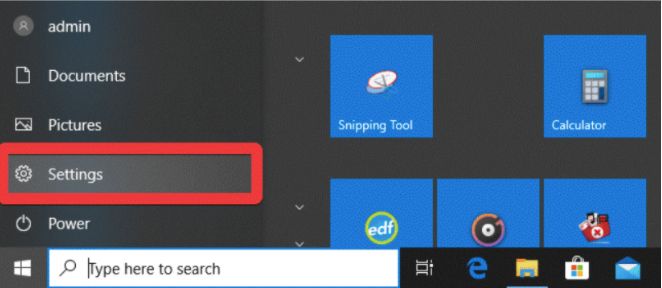
STEP 1 = Hit the Start button and click on the gear-like icon. It’s the Settings menu!
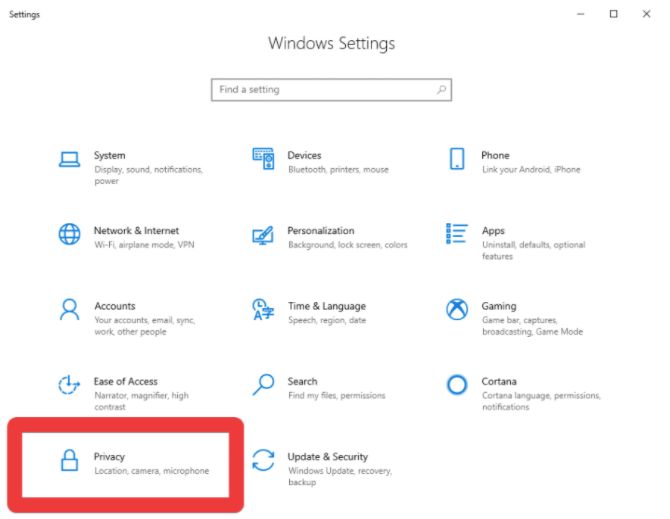
STEP 2 = As soon as the Settings window pops-up, navigate to the Privacy module. You can get an idea by observing the screenshot attached below.
STEP 3 = From the Privacy Settings window, you need to find and click on the Diagnostics & Feedback option. It can be found in the left-side panel. At this step, you need to hit the Basic radio button, which might have been previously selected to Full.
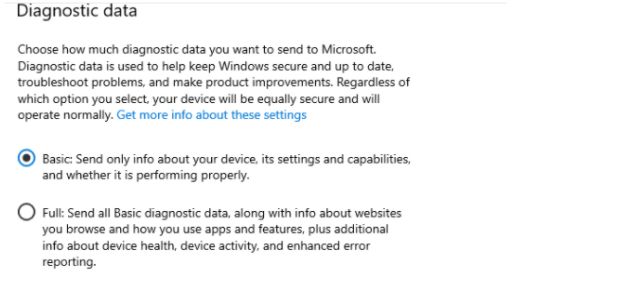
STEP 4 = As soon as you select this option, you’ve limited the amount of data that gets collected and sent to Microsoft.
Additionally, from the same Privacy Settings Window, you can find options to turn off Telemetry on Windows 11/10 and completely stop the data collection process. Keep reading the instructions mentioned below:
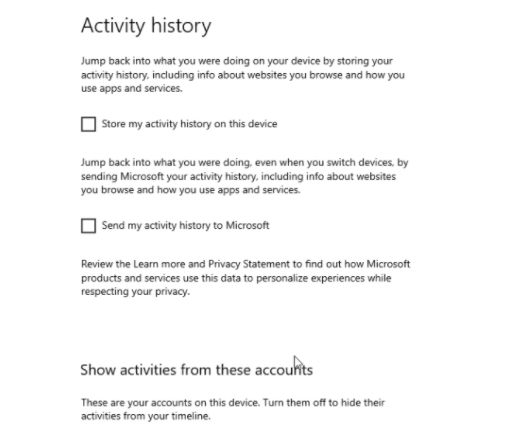
a. From the Privacy window, you need to navigate to the Activity history option.
b. Now, you need to uncheck the boxes next to:
- Store my activity history on this device.
- Send my activity history to Microsoft.
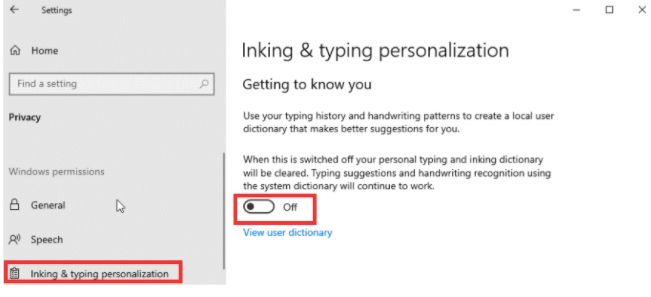
c. Now, you need to head towards the Inking & typing personalization module. It can be found under the Windows permissions header on the Privacy window.
d. Simply toggle off the option for Getting to know you.
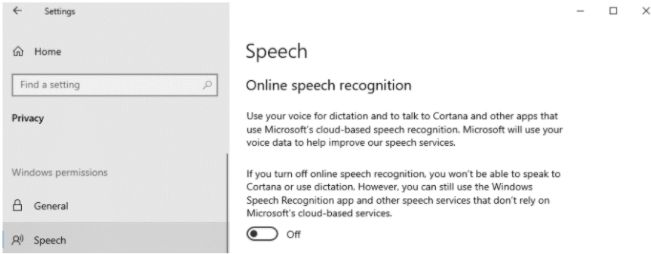
e. At this step, you need to go to the Speech module and toggle off the option for Online speech recognition as well. Doing so, you will stop the OS from sending any voice samples to Microsoft from time to time. So, it’s an important step too!
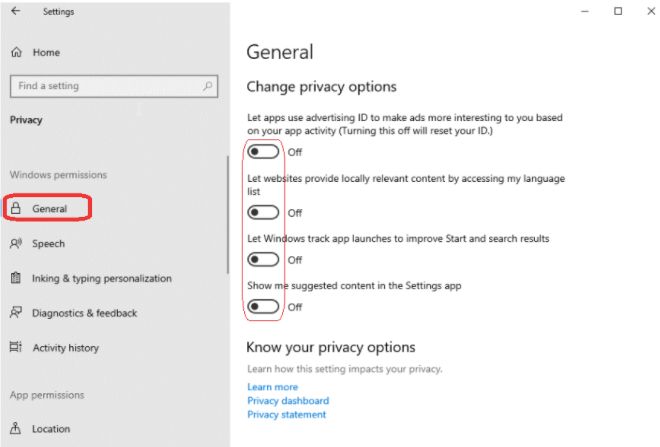
f. Now, head towards the General module and simply toggle off all the options mentioned here. This will completely stop the OS from collecting user data and share it to Microsoft.
Following the aforementioned steps, you will be able to easily limit the amount of data collection and disable Telemetry on Windows 11/10. Alternatively, you can follow other methods to turn off the feature.
METHOD 3 = Disable Particular Windows Services
The Telemetry functionality relies on a Windows Service that launches automatically every time you start your computer. Hence, you can successfully disable Telemetry on Windows 10 by disabling this service. To get started, follow the instructions stated below:
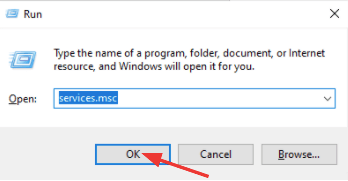
STEP 1 – Launch the Run window on your PC. You can press the shortcut keys – WIN + R to open the same. Type services.msc and hit the Enter button!
STEP 2 – Now look for a service – Connected User Experiences and Telemetry and double-click the same to see the properties. Head towards the General tab and change the Startup type to Disabled. Click the OK button to save the changes!
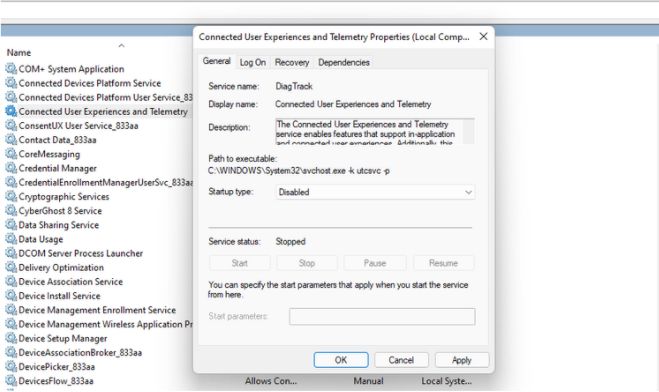
Similarly, look for the service – Device Management Wireless Application Protocol (WAP) Push message Routing Service and disable it in the same way. Now you just restart your computer and you’re all set!
METHOD 4 = Take Help Of Task Scheduler To Turn Off Telemetry
Here comes another workaround that can help you to disable Telemetry on Windows PC/Laptop. Consider using Task Scheduler for the purpose and follow the steps provided below:
STEP 1 – Go to the Search bar and type Task Scheduler. Click on the very first relevant result that appears on the screen.
STEP 2 – From the Task Scheduler window, you need to follow the path:
Task Scheduler Library > Microsoft > Windows > Customer Experience Improvement Program
STEP 3 – Now from the right-side window, you need to disable the task – Consolidator. For this, you need to right-click on the same and choose the Disable option.

Make sure to repeat the disabling process for all the tasks listed here. Do not forget to restart your computer to implement the changes!
So, that was it! This was all about “how to disable Telemetry on Windows 11/10 PC or Laptop”. If you have any queries or feedback, feel free to share the feedback and suggestions in the comments section below. Also, if you know any other hassle-free way to turn off the Telemetry feature on Windows 10/11, do drop them in the comments!
Frequently Asked Questions: About Telemetry On Windows 11/10 PC (2022)
Q1. Should I disable Telemetry?
There are absolutely no risks in disabling Telemetry. But we highly recommend our users to consider limiting the data that’s being shared over disabling the feature.
Q2. How to fix ‘Microsoft Compatibility Telemetry High Disk Usage Issue’ On Windows 11/10?
Well, this method would only work if you are operating on Windows 10/11 (Education, Enterprise or Professional editions) or Windows Server 2016 and later versions. To use the Group Policy Editor, you need to follow the step-by-step instructions shared below:
STEP 1 – Launch the Run window on your PC. You can press the shortcut keys – WIN + R to open the same. On the Run window, you need to type gpedit.msc and hit the OK button.
STEP 2 – From the Local Group Policy Editor window, you need to follow the path:
Computer Configuration > Administrative Templates > Windows Components > Data Collection and Preview Builds.
STEP 3 – Now double-click on the Allow Telemetry option from the right-side window and select the Disabled option. To save the changes, hit the OK button.
Now, head towards the Task Manager window and check whether the high disk usage is fixed or not.
Q3. How do I disable Telemetry on Windows 11?
This is the easiest way to turn off Telemetry on Windows 11 PC:
STEP 1 – Launch the Run window on your PC. You can press the shortcut keys – WIN + R to open the same. Type services.msc and hit the Enter button!
STEP 2 – Now look for a service – Connected User Experiences and Telemetry and double-click the same to see the properties. Head towards the General tab and change the Startup type to Disabled. Click the OK button to save the changes!
Similarly, look for the service – Device Management Wireless Application Protocol (WAP) Push message Routing Service and disable it in the same way. Now you just restart your computer and you’re all set!
Also Read