Here Are The Different Methods And Tools To Repair Windows 11. Now that Windows 11 is finally out and we are enjoying a fresh version of our favourite operating system, there are certain things that are going wrong while using your favourite PC.
What’s Wrong With Windows 11 Operating System?
There are a variety of problems that may appear while using the all-new Windows 11:
- New reports are emerging about early adopters of Windows 11 experiencing poor Wi-Fi performance.
- The all-new Start Menu sometimes becomes unclickable and the Search bar prevents users from typing.
- Users have also complained about high memory & RAM consumption, making the operating system slower.
- Several people are also complaining about the Windows Taskbar becoming unresponsive and sometimes disappearing altogether.
- Most of the users are also reporting about constantly receiving the error message This PC can’t run Windows 11.
In case your PC with Windows 11 is running into any of the aforementioned issues or similar kinds like system crashing, slow loading, and so on, then we recommend you to learn how to repair Windows 11.
How To Repair Windows 11 (2021)
To help you resolve common Windows 11 issues, we will introduce you to the best ways and tools to get started with repairing the new operating system.
| But before we begin, remember to backup all your important files and folders carefully. This is certainly an important step before you initiate the Windows 11 Repair Process. Because there are pretty high chances that some of your files may get lost during the entire procedure. You can also put all your important data on Cloud Storage Platform to safeguard your files. |
WORKAROUND 1 = Consider Running Windows Troubleshooter
Just like Windows 10, the latest OS version offers a dedicated functionality = Windows Troubleshooter that can help users to diagnose the potential issue running on their computer and let suggest an ideal solution to fix the issue. To use the feature, all you need to do is:
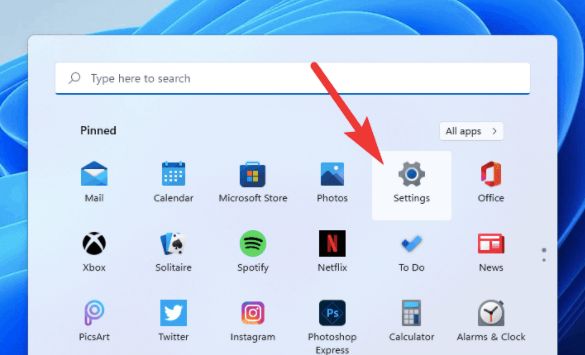
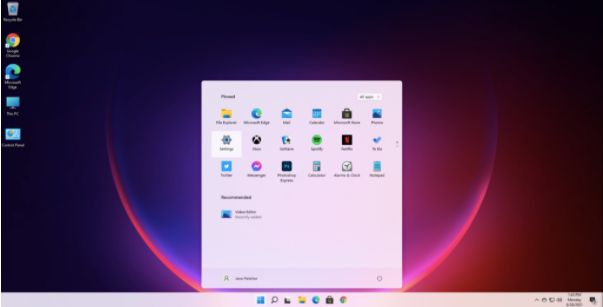
STEP 1 = Go to the Start Menu and launch the Settings app. Alternatively, you can hit the shortcut keys – Windows + I together on your keyboard.
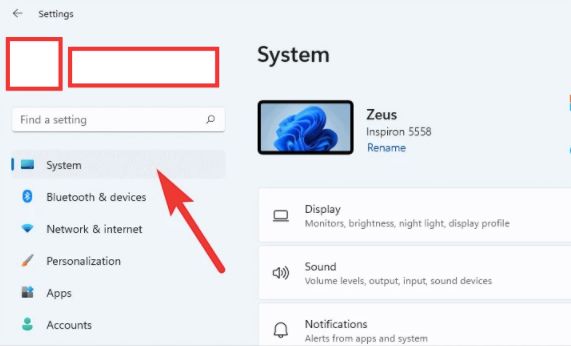
STEP 2 = From the Windows Settings you need to head towards the System tab, located on the left-side of the window.
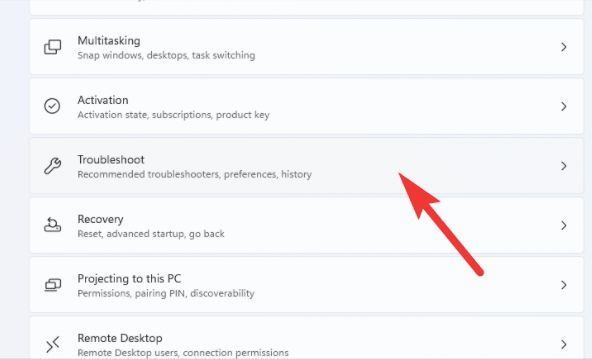
STEP 3 = Now, scroll down to find Troubleshoot option from the list. Click on the same to proceed!
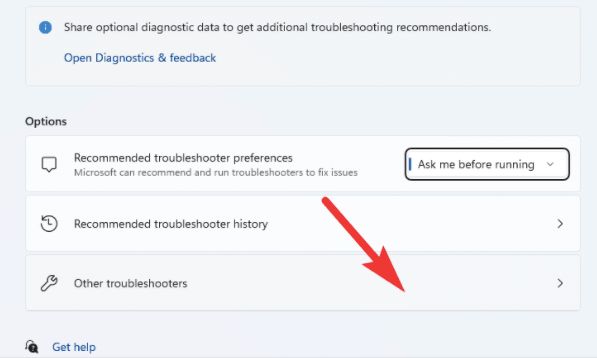
STEP 4 = At this point, you need to hit the option that states ‘Other troubleshooters’.
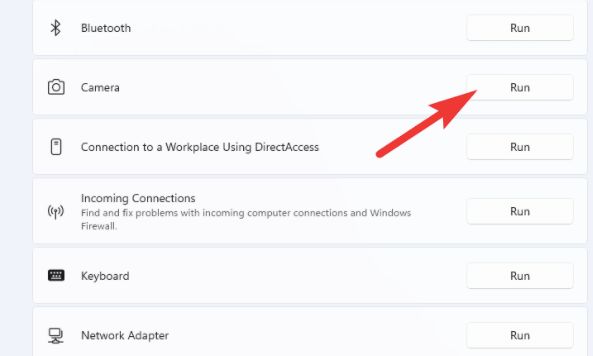
STEP 5 = At this point, to allow the functionality to run a comprehensive scan, hit the Run button next to each peripheral option to resolve the issue. You can refer to the screenshot shared below to get a clearer idea.
This is probably the best way to repair Windows 11 without putting in much effort. In case, certain issues persist, try the next workaround shared below.
WORKAROUND 2 = Uninstall The Recent Windows Updates
If you are tired of frequent system crashes, sluggish performance and similar bugs out of the blue, we recommend you try uninstalling the recent updates to start repairing Windows 11. You can follow the instructions mentioned below to manually remove the latest Windows updates from your OS:
STEP 1 = Go to the Start Menu and launch the Settings app. Alternatively, you can hit the shortcut keys – Windows + I together on your keyboard.
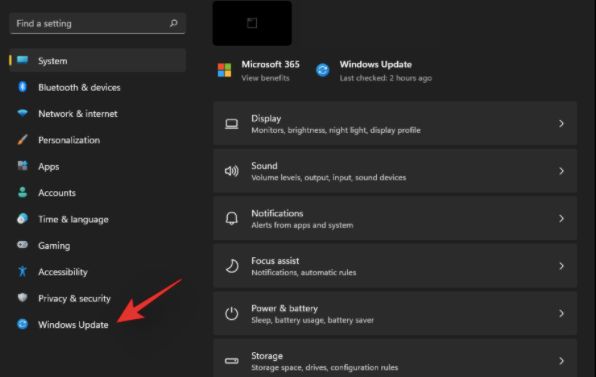
STEP 2 = Navigate to the Windows Update from left-side.
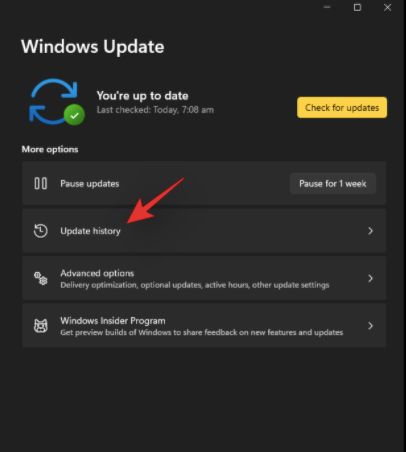
STEP 3 = Now, you need to head towards the Update History option from the right-side window.
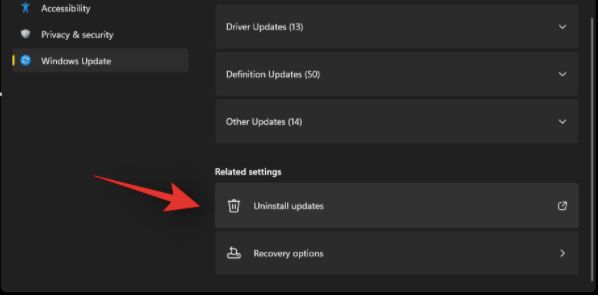
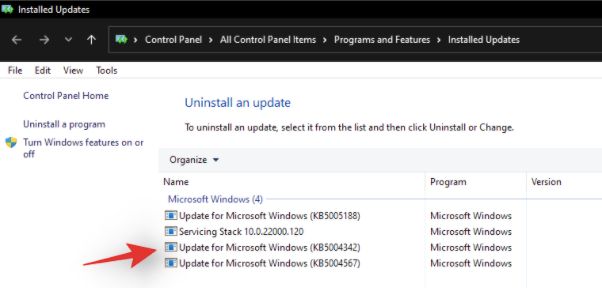
STEP 4 = At this point, locate and click the option that says Uninstall Updates.
STEP 5 = As soon as you click on the same, you will be redirected to the Control Panel. This is a place where you would find all the latest updates installed on your computer. You just need to click on the recent update you wish to uninstall.
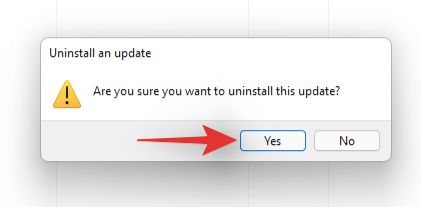
STEP 6 = You need to click on the Yes button to confirm the uninstallation action.
Keep patience and let the system securely uninstall the selected update. Make sure you restart your system to implement the changes. Hopefully, you would be free from potential issues caused by Windows 11.
WORKAROUND 3 = Run System File Checker (SFC) Utility
Using the Command Prompt in Windows 11 you can use the built-in System File Checker utility which is a Power tool, responsible for finding and automatically repairing corrupted and damaged system files. To use the feature, all you need to do is:
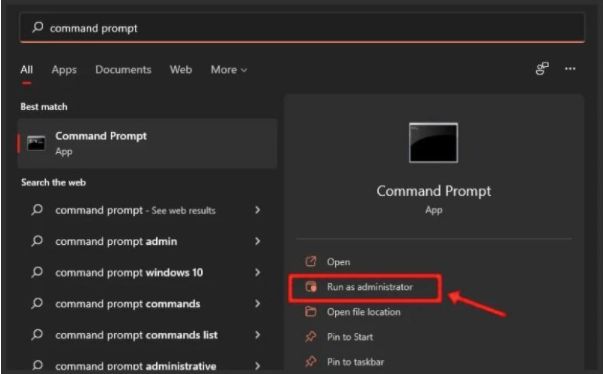
STEP 1 = To initiate an SFC Scan and repair Windows 11, simply navigate to the search bar and type Command prompt. As soon as the relevant result appears, simply right-click on the same and choose the option Run as administrator.
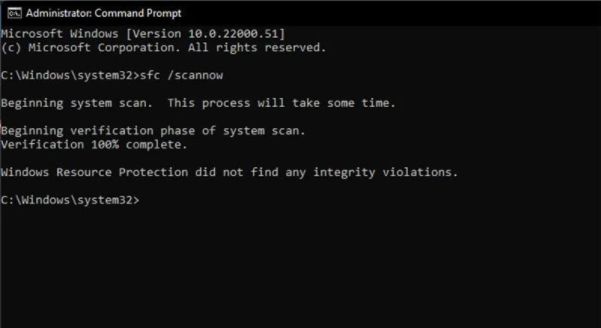
STEP 2 = From the CMD window, you need to type sfc /scannow. To execute it, simply press the Enter button.
STEP 3 = As soon as you press the Enter button, an automated scan will be initiated. Keep patience as the entire process can take some time.
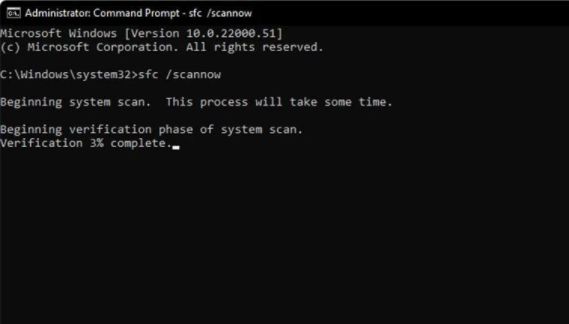
If the System File Checker utility detects any damaged system files, it will automatically replace them with fresh copies. In case, everything is good, the result will appear as shown below!
This is how you can easily repair Windows 11 using SFC scan functionality. In case certain issues persist, try another method shared below.
WORKAROUND 4 = Use Windows 11 Startup Repair
To successfully repair Windows 11 while booting, we recommend you to try using Windows 11 Startup Repair. The feature will automatically detect and fix common issues that you might be facing with the new OS. To use Windows Startup Repair, follow the instructions mentioned below:
STEP 1 = At first, you need to switch off your computer completely. Now press the Power button and while your system is in the boot state, hit the F11 Key. This will open the Advanced Startup menu.
STEP 2 = If you are able to see the sign-in screen of Windows 11, you need to click on the Power icon and then hit the Shift key, while holding it, you need to click on the Restart option. This way, you will be able to enter the Windows 11 Startup Repair window.
STEP 3 = At this point, you need to follow the path: Click on Advanced Startup > Troubleshoot > Advanced options > Startup Repair.
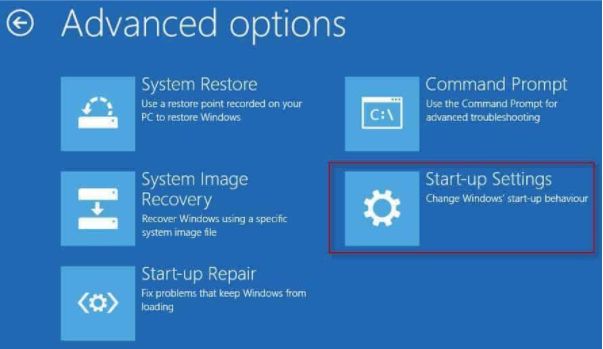
As soon as you click the option, Windows Startup Repair functionality will start diagnosing for the potential issues appearing on your Windows 11 OS during startup. Hopefully, this method will help you repair Windows 11 while booting.
If you are looking for the best Windows 11 repair tools that will help you to fix these issues.
WORKAROUND 5 = Repair Windows 11 With DISM Scan
Similar to SFC scan, you have an admin-level command – DISM (Deployment Image and Servicing Management) feature to fix potential issues with your system image to repair Windows 11. Follow the instructions shared below to execute the command line.
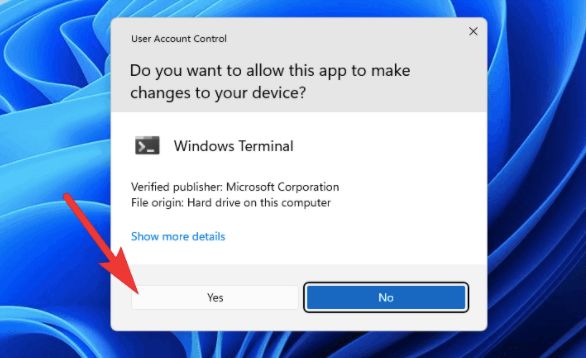
STEP 1 = Navigate to the Start Menu on your Taskbar, find Windows Terminal (Admin) option.
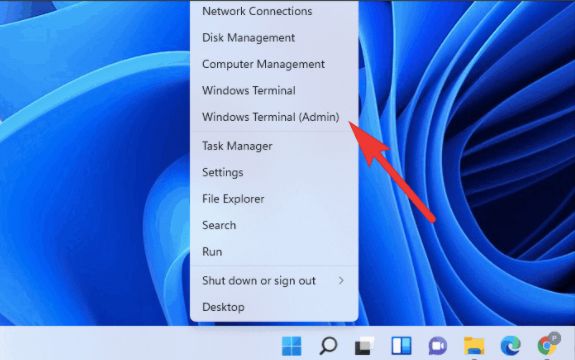
STEP 2 = Hit the Yes button to launch the command-line tool.
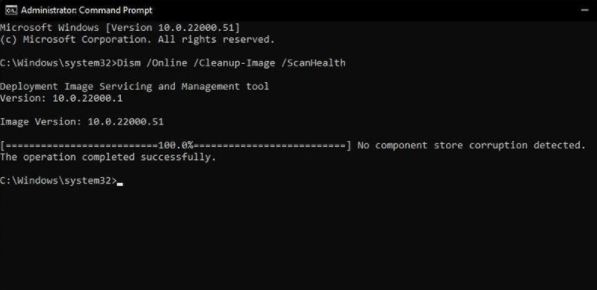
STEP 3 = Simply copy and paste the following command line:
Dism /Online /Cleanup-Image /ScanHealth
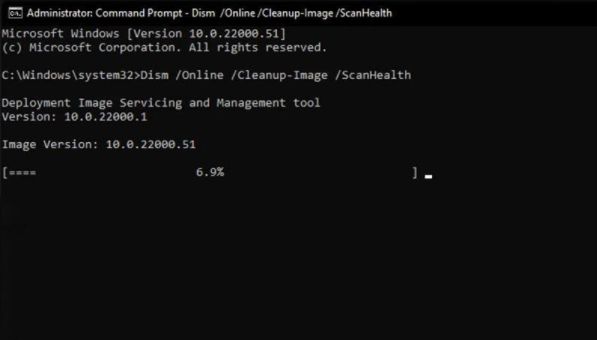
STEP 4 = As soon as the tool finishes the scanning process, the next screen on your PC should appear something like the below screenshot.
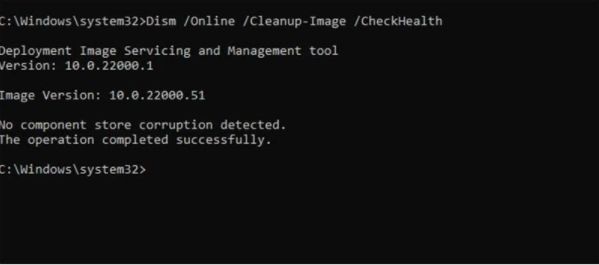
STEP 5 = After this point, you have to run another command line:
Dism /Online /Cleanup-Image /CheckHealth
STEP 6 = Since our computer was in an optimal state, the results shown on your device might be different.
STEP 7 = In case the DISM tool found the problems, execute another command line:
DISM /Online /Cleanup-Image /RestoreHealth
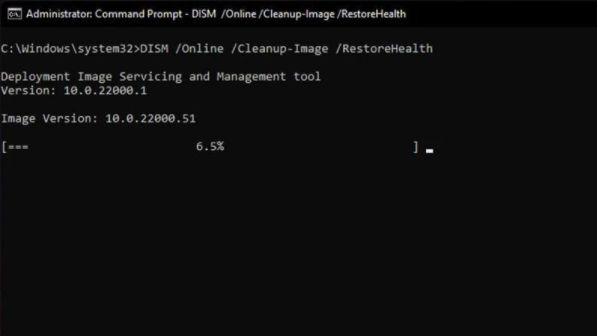
Keep patience and let the DISM tool repair Windows 11. Make sure you restart your computer to implement all the necessary changes!
WORKAROUND 6 = Update Device Drivers On Windows 11
Well, sometimes incompatible, damaged, missing and outdated drivers can cause Windows 11 installation issues. Hence, to rule out every potential possibility, we recommend updating all your faulty drivers to repair Windows 11. To update your drivers manually, you can follow the steps below:
STEP 1 = Launch Device Manager.
STEP 2 = From the Device Manager window, locate the drivers that need immediate attention. Signs of faulty/old drivers include a Yellow Question Mark symbol appearing next to the driver.
STEP 3 = Right-click on it and select option Update Driver or Uninstall device, as per your preference.

STEP 4 = Simply, follow the on-screen wizard to initiate the update process.
Once done, restart your Windows 11 to implement the changes.
Alternatively, we suggest using a dedicated driver updater software to install the latest updates of bulk drivers in one go. Using the best driver updater software for Windows 11 will not only save your time and efforts but will also maintain security since you will be downloading the updates from official and trustworthy sources
WORKAROUND 7 = Consider Resetting Your Windows 11
Last but not the least, if none of the solutions mentioned above helped you to repair Windows 11, try to reset Windows 11. Just make sure you have a backup of all important files before you initiate the process.
STEP 1 = Launch Settings App or you can press WIN + I shortcut.
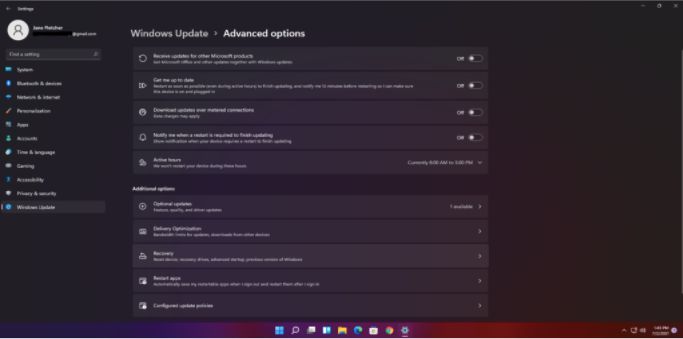
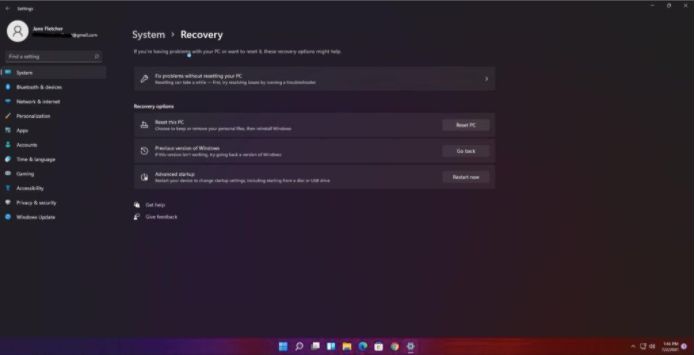
STEP 2 = Head towards the Windows Update module and navigate to the Advanced Options. You need to further click on the Recovery button.
STEP 3 = From the Recovery window, find and click the option Reset this PC.
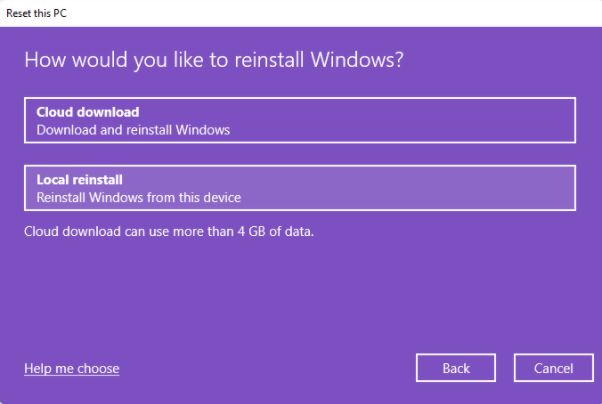
STEP 4 = In the next pop-up window, you will be asked whether you would like to keep your files on the PC or erase everything. You can choose any option according to your choice!

STEP 5 = At this point, you need to select the Cloud download option to install a fresh copy of your Windows OS.
STEP 6 = In the next pop-up window, you can see what all will happen when you choose to reset Windows 11. Click the Reset button to continue!
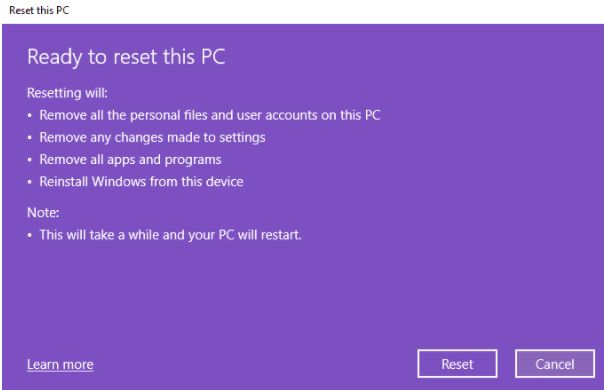
That’s it! Your system will begin the Windows 11 Reset Process. Just remember, you need to keep patience as this process can take around 45 minutes.
FAQs
Q1. Can I reset Windows 11?
Yes, Windows 11 has made the entire process of How to reset Windows 11 easier than ever before. You can find the option in the Settings menu in Advanced Options.
Q2. What to do if Windows Cannot repair?
Well, you need to implement the steps to force a Windows Repair. Alternatively, you need to consider uninstalling and reinstalling the OS to fix the potential issues.
Q3. How can I repair my Windows 11?
There are a variety of methods that you can implement to repair Windows 11:
- Run Windows Troubleshooter
- Uninstall The Recent Windows Updates
- Run SFC Scan
- Take help of Windows 11 Startup Repair
- Run DISM Command Line
That’s all! This was our thorough guide on how to repair Windows 11. If you have any queries, feel free to share them in the comments section below!
Also Read