Did your Logitech g533 mic stops working randomly, and you are bothered? It’s nothing to worry about. Issues of Logitech G533 Mic Not Working are not only peculiar to Logitech, it is something you can face from using other devices. But if you are experiencing a Logitech g533 mic not working, we have the 7 best fixes to explore.
The Logitech G533 is well known for the features that make it distinct and the kind of quality it offers as regards sound quality. As we know, it is a headset used for gaming purposes.
Why is my Logitech G533 Mic not working?
There could be several causes for the malfunctioning of your Logitech G533 microphone. Among the most frequent causes are:
- Incorrect settings: The volume may be too low, or the microphone may not be configured as the default recording device.
- Driver problems: Damaged or outdated drivers can make it difficult for the microphone to work properly.
- Damage to the microphone’s boom or wire could make it physically unusable.
- Wireless interference: The microphone may not function if the headset is not properly linked or if there is wireless interference.
- Software conflicts: Some applications or programs could interfere with the Logitech G533 software and stop the microphone from functioning properly.
7 Ways To Fix Logitech G533 Mic Not Working Issue
1. Update Logitech drivers using Driver Booster
Use the procedures below to update Logitech drivers using Driver Booster:
1. Download the Driver Booster tool from the below button.

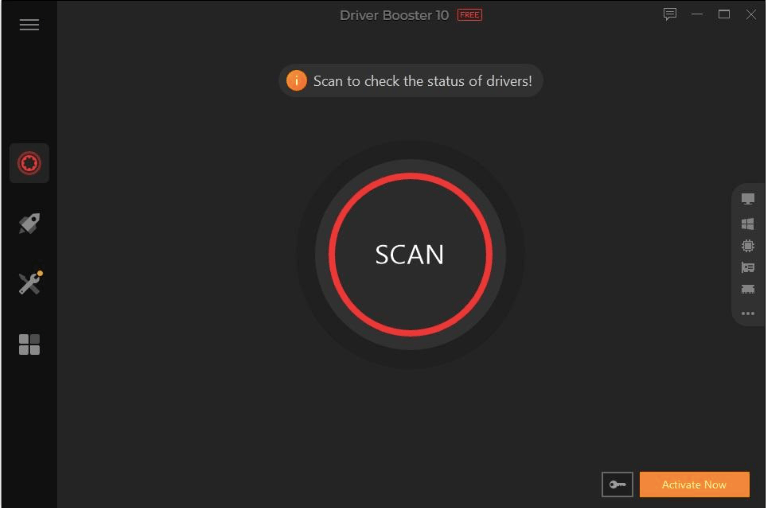
2. Launch the Driver Booster after installation, then select the “Scan” button. Your machine will begin to be scanned by Driver Booster for outdated or missing drivers.
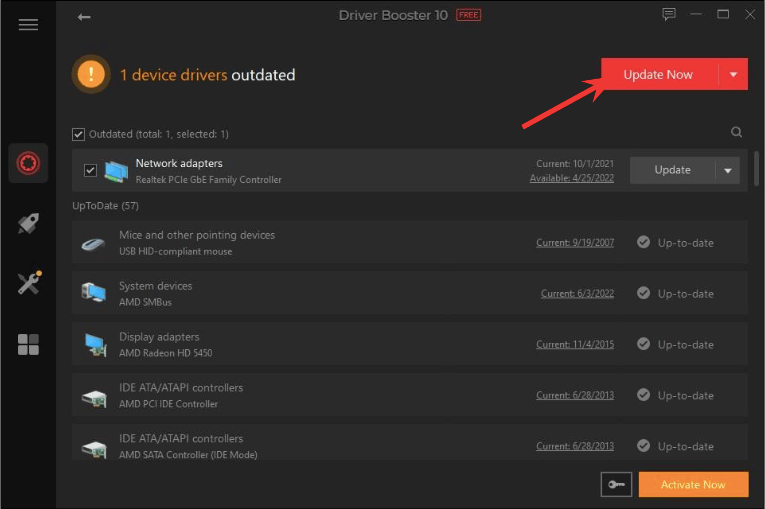
3. After the scan, the driver Booster will show a list of outdated drivers, including the Logitech drivers.
4. Simply click the “Update” button next to each Logitech driver to update them. You can also click the “Update All” button to update all drivers simultaneously.
5. Wait for Driver Booster to install the latest Logitech drivers. This may require some time, depending on the size of the drivers and the speed of your internet connection.
6. Restart your computer to apply the changes when the Logitech drivers have been updated.
2. Reconnect the Device
- Remove the Logitech G533 headset from your computer.
- Remove all other wires and external hardware from your computer. Relaunch the computer.
- Reconnect the Logitech G533 headset after some waiting. Verify that the audio in the headset is audible. If not, proceed to the following option.
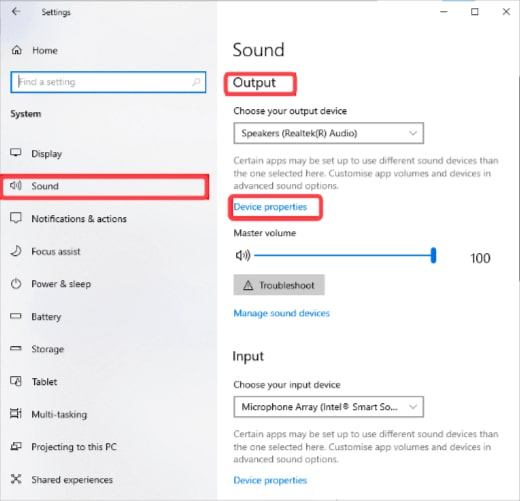
3. Test the audio output.
If your computer has multiple audio devices connected, you must confirm the output device that will be the default. Follow these instructions to ensure the output device is on your Windows 10 computer.
1. Select Speakers from the taskbar’s bottom menu.
2. Click the arrow sign to view your PC’s connected devices.
3. Make that the audio is playing through the Logitech G533 device (headphones) by clicking on it afterward.
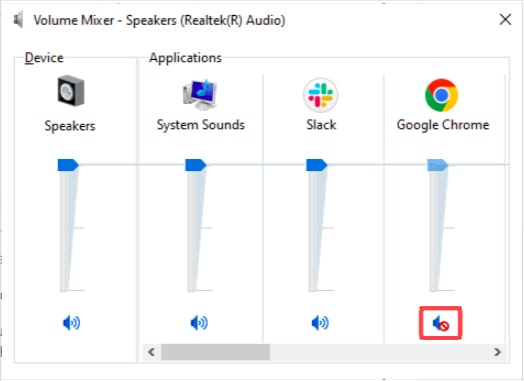
4. Next, right-click the same volume indicator and select Open Volume Mixer from the menu that appears.

5. Click on any muted tabs in the Volume Mixer – Speakers window to make them active.
6. Go to Windows Settings now by clicking Start and then the I key.
7. Next, select System.
8. Press Device settings under the left pane’s Sound tab below Output.
9. If the Disable option is checked, uncheck it.
10. The two actions listed above for input devices will resolve the Logitech G533 Mic’s audio problems.
4. Troubleshooter for Hardware & Devices
Using a built-in troubleshooting program on your PC, you can quickly fix any issues with the Logitech G533 microphone. To use the hardware and device troubleshooter, follow these directions.
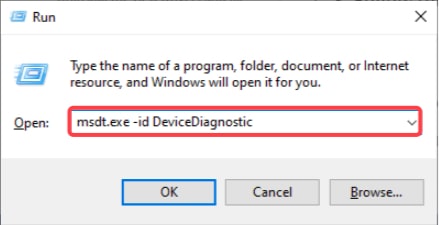
1. By hitting Win + R, you can access the Run dialogue box.
2. Enter msdt.exe -id DeviceDiagnostic after that, and then click OK.
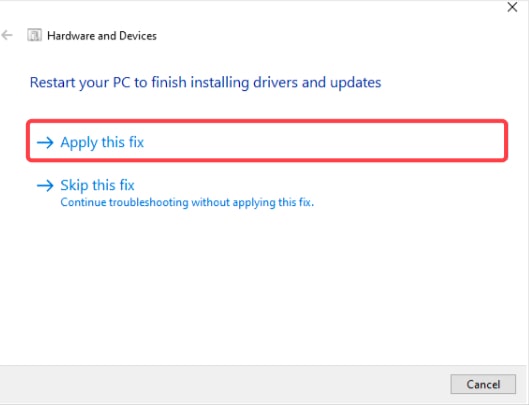
3. Press the Next button now.
4. You will see the prompt below if your device’s drivers must be updated with the most recent versions. Complete the installation process as directed, then restart your computer.
5. Close any other applications using audio.
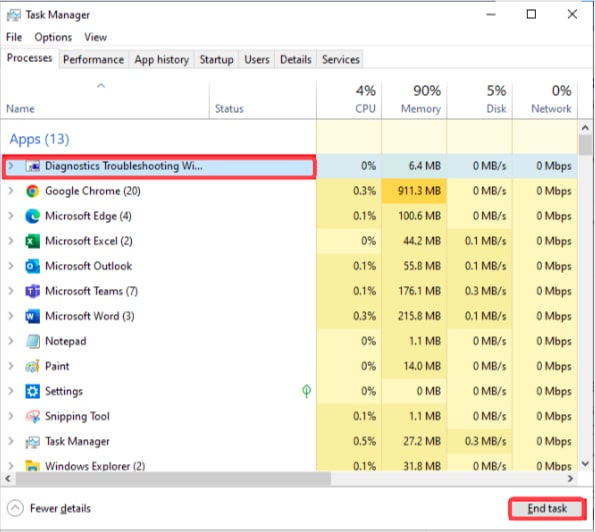
Multiple background audio-related operations running simultaneously on a PC will use many more system resources. This will result in the Logitech G533 Mic’s inability to hear audio. As seen below, we advise you to terminate all superfluous tasks.
1. To launch Task Manager, simultaneously use the Ctrl, Shift, and ESC keys.
2. Click on the Processes tab and then choose the End task option in the top right corner, as shown.
3. For each background task, use the same procedure, then restart your computer.
6. Reinstall Logitech Gaming Software
- Use the Windows, and I keys to navigate to Settings on a computer.
- Press Apps now.
- Now, scan the bottom of the screen for Logitech gaming software. Click on it and choose Uninstall if you find any.
- When prompted once more, select Uninstall.
- Verify once more that you have removed the software
- Confirm your search criteria message when you conduct a second search for the program.
- Now type %appdata% into the Windows search box.
- After that, click the AppData Roaming folder and go to the next location:
C:\Users-USERNAME-AppData-Local-Logitech-Logitech Gaming Software-profiles
- Next, pick every file and then delete it.
- Go to the Windows menu once more and enter %LocalAppData%.
- Next, go for the Logitech Gaming Software folder and delete each folder.
- The methods below will help you reinstall the Logitech gaming software once you have deleted all the related files and directories.
- After downloading the file, select My Downloads and double-click 02.65_x64_Logitech (the version may differ depending on your file).
- Up to the installation screen, keep pressing the Next button.
- Check to see whether you’ve resolved the Logitech G533 headset mic not working problem after installing the software.
7. Update Audio Drivers
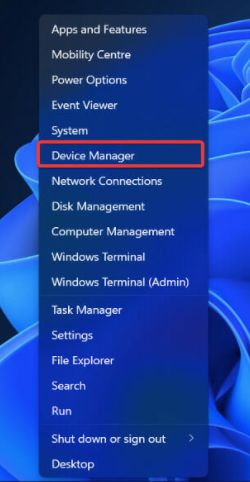
- Click on the Windows icon and search for “Device Manager.”
- Select Audio inputs and outputs by double-clicking. The list of audio drivers will grow as a result.
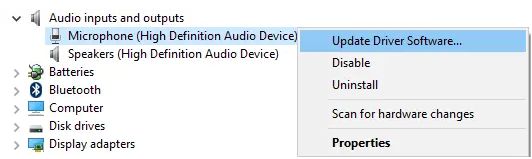
- Update the driver by performing a right-click on the audio driver, such as Microphone (2- High Definition Audio Device).
FAQs
Why is my Logitech headset mic not working?
- Verify the connections: Ensure your device is correctly linked to your Logitech headset.
- Look over the settings: In your device’s sound settings, confirm that the microphone is the default recording device.
- Examine the volume: Verify that the microphone on your Logitech headset is not muted or turned down.
- Verify drivers: Ensure you have installed the most recent headset drivers if your Logitech microphone is still not working.
- Attempt a different gadget: If none of the aforementioned solutions works, try your Logitech headset with a different gadget to determine whether the problem lies with that one or the headset itself.
How do I turn on my Logitech headset mic?
- Access the “Sound” menu.
- Choose your Logitech headset as the default microphone under the “Input” option.
- Check to see whether the microphone is not muted or off.
- Make sure the microphone is operational by testing it.
Does the Logitech G533 have a mic?
The Logitech G533 gaming headset does indeed include an integrated microphone. The headset’s left ear cup houses the microphone, which may be moved up and down to alter the position. The microphone on the G533 also has interference-canceling technology, which lessens background noise and enhances voice quality.


