[alert-announce]Windows 11 is loaded with many amazing features, one of them is a snipping tool. Snipping tools lets you take screenshots in Windows 11. Although it works seamlessly on the PC sometimes you may face Screenshot not working on Windows 11 or print screen not working errors.[/alert-announce]
It is a common error that most users have faced while using the snipping tool. Sometimes you may get a print screen not working due to several glitches. If you are among them then it is good news for you. You have landed on the right platform where you will get all the solutions to get rid of the error and work smoothly on your PC to take screenshots.
6 Methods to Fix Screenshot Not Working in Windows 11
In this article, we are going to discuss the six best methods that will fix the windows + print screen not working issue.
Method 1: By Restarting the App
If you are facing Windows 11 Screenshot not working the first and foremost method you should use is to restart the snipping tool app. Sometimes just restarting the app can resolve the issue. Follow the steps to execute this method:
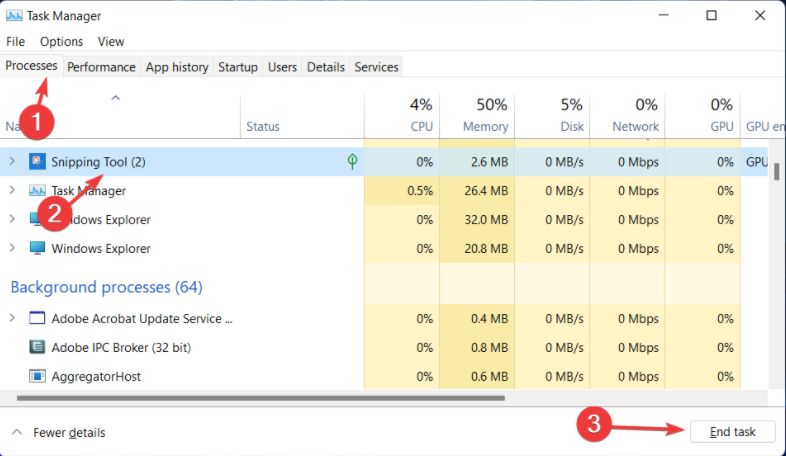
- Open the Task Manager by holding Ctrl+ Shift + Esc keys together on the keyboard.
- When the Task Manager Windows appears, click on the processes tab.
- Now, navigate to the snipping tool option and click on it. And then click on the End Task given at the bottom of the right corner.
- Now, search for the snipping tool in the start menu. Click on the snipping tool and try to take the screenshot to check if the issue has been fixed or not.
If the issue is still there you can try other methods to fix the issue.
Method 2: Use Keyboard to take Screenshots
Another method that you can use to take screenshots on your Windows 11 is using your keyboard shortcuts. Press Win + Shift + S keys together on the keyboard. It will authorize you to take screenshots.
If this method doesn’t work then go for the next option in the list.
Method 3: Run the Snipping App in the Background
Below are the steps to enable the Snipping app to run in the background:
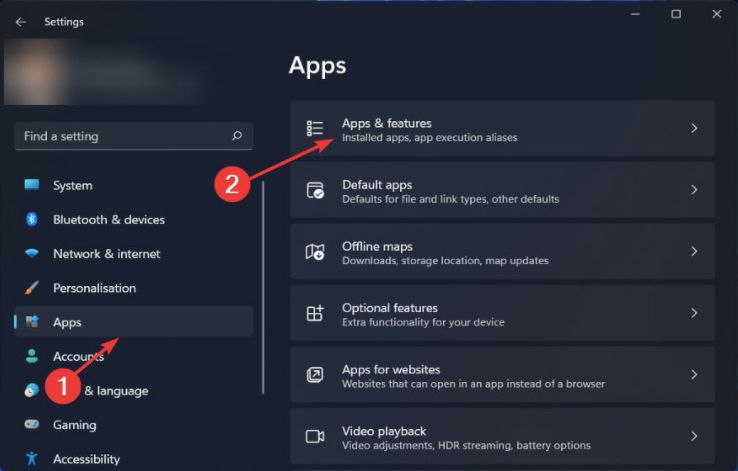
- Open Settings by pressing Win + I keys together on the keyboard.
- When the settings window appears, choose the apps option given in the left pane.
- Then click on the apps and features given at the right of the page.
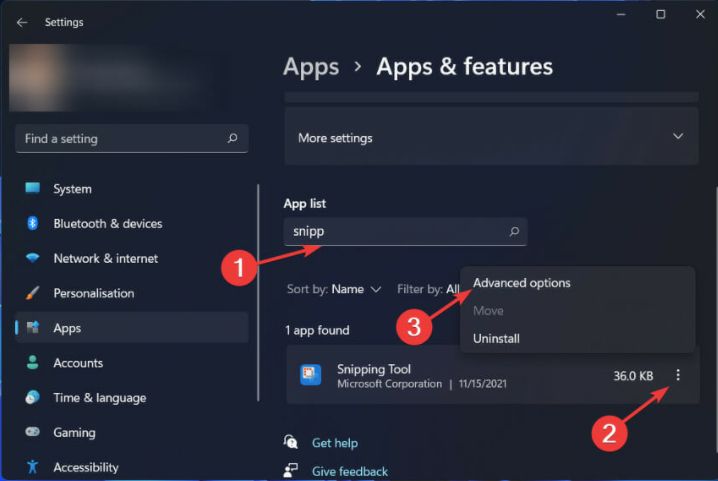
- Under the app list type snipping tool in the search box to quickly find out snipping tool.
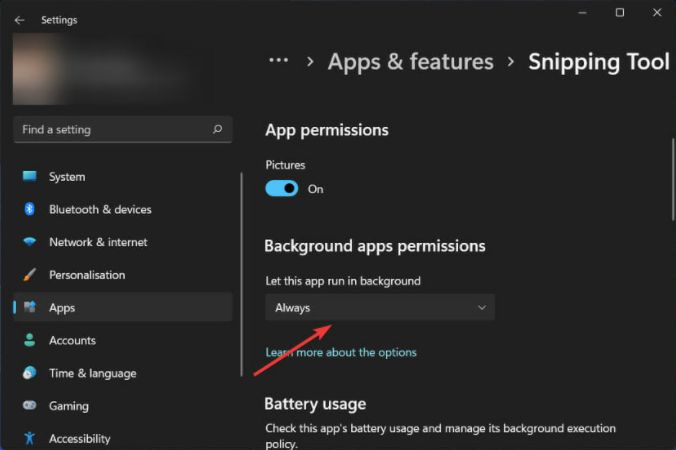
- Next, click on the three dots and select the advanced options.
- After that look for the background apps permissions and then click on the drop-down arrow and select always.
After the process is completed restart your PC and run the snipping tool again to check if the issue has been fixed or not.
Method 4: By Running SFC Scan
Another method that you can use to fix the Windows 11 Screenshot not working. SFC scan fixes the error caused due to the corrupted or damaged files in the PC. You can follow the given steps to run an SFC scan:
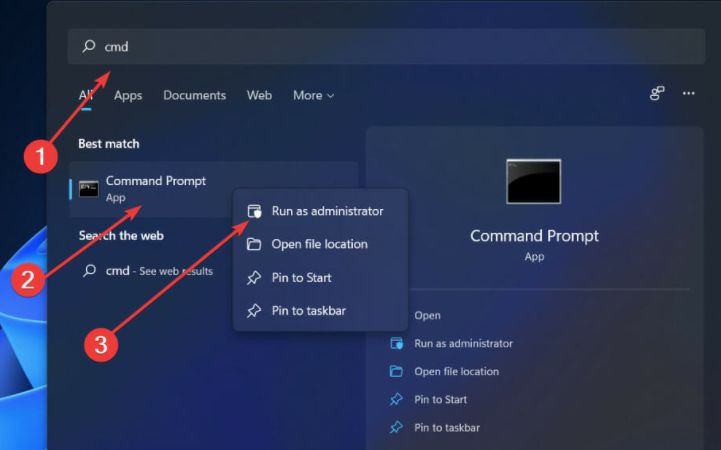
- Type cmd in the search box given at the bottom of the screen on the left side.
- Then right-click on the command prompt and choose run as administrator.
- When the administrator command prompt window appears, type the given below command:
Sfc/scannow
- Now, hit the enter key.
- Wait until the process completes. It will take a few seconds to search for the issues. After that shut down your PC.
- Restart your system and check if the issue has been fixed or not.
Method 5: Try to Update the Keyboard Drivers
Another reason behind the error in taking screenshots is outdated keyboard drivers. You can fix the issue by updating the keyboard drivers.
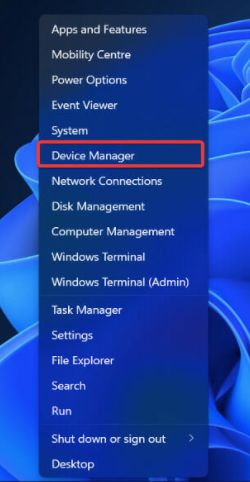
- Open Device Manager.
- When the Device Manager window opens up, navigate to the keyboard option.
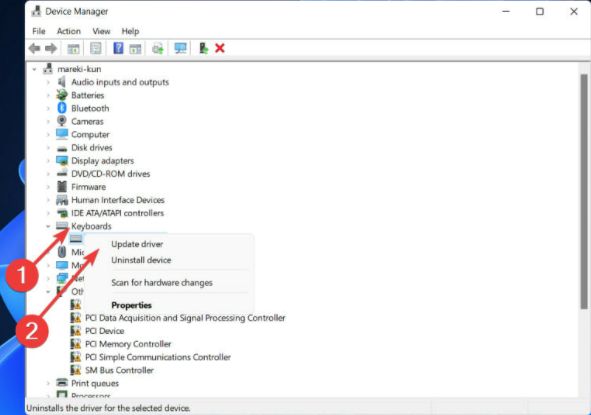
- Now, choose a standard PS/2 keyboard and right-click on it. Then click on update driver.
- In the next window choose the first option which is to search automatically for updated driver software.
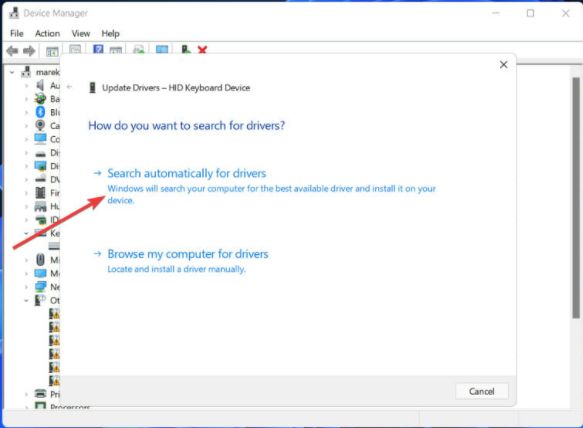
- Windows will take a few seconds to install the latest drivers.
At last, restart your system and check if the print screen not working error still occurs or not.
Method 6: Try to Repair the App
If none of the above methods works then try to repair the app. You should follow the below steps to repair the app:
- Firstly, type the snipping tool in the search box.
- Now, from the search results, go to the first option and right-click on it to select apps settings.
- After that, scroll down the page and under the reset, section chooses the repair option.
- You can also select the reset option if repairing doesn’t fix the issue.
Conclusion On Screenshot not Working on Windows 11
In the above article, we have listed the best methods that can quickly fix the Windows 11 Screenshot not working. Print screen and snipping tools are the most useful tools in Windows 11 that help in taking screenshots on the PC.
If any error occurs like print screen not working or snipping app doesn’t open then you can choose any of the above methods to fix it. I hope the article would be useful for you to get rid of the error and again use the screenshot feature in Windows 11.
FAQs
Why is screenshot not working on Windows 11?
The screenshot not working on Windows 11 occurs due to several reasons. If you have outdated keyboard drivers it may lead you in trouble to take screenshots. Another reason js having corrupted or damaged files in your system prevent the snipping tool to work. There are several other reasons which doesn’t allow you to take screenshots in Windows 11.
How do I enable screenshots in Windows 11?
You can take screenshots in Windows 11 through multiple ways:
- Press the PrtSc key on the keyboard to take a screenshot of the whole screen.
- If you want to take a screenshot of a particular part then press Win + Shift + S keys together on the keyboard.
Why isn’t my windows screenshot working?
If you can’t able to take screenshots on Windows PC one of the major reasons behind it is that you have outdated or incorrect keyboard drivers. In this situation, you need to update your drivers to fix it.
Another reason is you might not have enabled the print screen key. The windows screenshot isn’t working due to the Windows operating system.
Why is snip tool not working on Windows 11?
Snipping tool in Windows 11 helps in taking screenshots as well as includes many other features. Sometimes, it might fails to open and doesn’t work on Windows 11. The main reason behind is due to the expired digital certificate preventing users from launching or using multiple built in programs.
Also Read